Note: Please keep the programs that you create today, in case you have a question about your grades for the ICEs at the end of the quarter. When you're working with a partner, each person should save their own, individual copy.
 Part
1: Start Learning How To Learn New HTML: H2...H6
Part
1: Start Learning How To Learn New HTML: H2...H6
One of the most important skills that you can aquire as an IT person (any IT person - web designer, network infrastructure technician/engineer, software developer, program manager, etc) is to get used to learning new things semi-independently. And, like all skills, you aquire it (in large part) through practice.
For this exercise you're going to experiment with several other levels of headings: H2, H3, H4, H5, and H6. These function largely like H1 does - they mark different 'levels' of a document. Typically, each level is used to subdivide the ideas in the level above it. So if you have an H1 element that reads 'Using Tables In HTML', then you might have several H2 elements, such as "How To Write The HTML To Create A Basic Table", "How To Use Tables Effectively", and "Tables vs. DIVs in HTML".
For this exercise you should create a new HTML file, and try out H2...H6 on your own.
When learning a new HTML element you typically first look for a tutorial or an example page to examine, and once you've done that you then try out the new element in a small, 'throw-away' page that you don't really care about (instead, you're just using it to test out this one new feature in isolation).
After you've figured out 'what to type' (i.e., the syntax for this feature) then you might think about how to use this new feature effectively in your pages. One approach might be to think about a topic that you'd like to explain to someone and then draw up an outline of a document showing how you'd structure your explanation.
Be ready to show what you've done, and to explain both what you did and what it told you
Part
2: Learning How To Learn New HTML: OL, UL
For this exercise, you should practice 'learning how to learn' HTML, and do whatever you need to in order to learn the UL and OL elements.
For this part you're going to examine a new structure: ordered lists and unordered lists. Ordered lists are shown as numbered lists (1, 2, 3...) by default, but can also be shown as lettered lists (A, B, C, ..., or a, b, c,....) or as roman-numeral lists (i, ii, iii, iv,...), amongst others. Here's an example:
Things I like to eat, from most-liked to least-liked:
- Apple
- Pear
- Doughnuts
Unordered lists are shown as a bulleted list by default, but can use other symbols (or even images) if you want. Here's an example:
Before leaving the house I make sure that I am wearing all of the following:
- Shoes
- Shirt
- Pants
It's worth noting that you can 'nest' the lists inside each other. In the following example you'll see that the 'outer' list is an ordered (numbered) list, and there's a unordered list nested within the first item, and an ordered list nested within the second item.
- First item in the outer (ordered) list
- First item in the inner (unordered) list
- Second item in the inner (unordered) list
- Third item in the inner (unordered) list
- Second item in the outer (ordered) list
- First item in the inner (ordered) list
- Second item in the inner (ordered) list
- Third item in the inner (ordered) list
You'll notice that the items in the nested, ordered list are actually 'lettered' as A, B, C (instead of being numbered as 1, 2, 3) - this is because your instructor has used some CSS (Cascading Style Sheets) in order to tell the browser to letter the items instead of numbering them.
For this exercise you're going to semi-independently figure out how to create ordered and un-ordered lists. The 'independent' part comes from the fact that you're going to be figuring this out all on your own, the 'semi-' part comes from the fact that the instructor will be providing a lot of guidance to help you do that.
The first step is to do some quick research to figure out both the syntax of the OL and UL elements (i.e., what should you type?) as well as the semantics (i.e., what does the LI element mean, and how will the browser react to it?). Here are a couple of ideas that you might consider looking at - ultimately you should use whatever combination of resource work best for you.
- View Source of an example page
- One time-honored way of figuring out how to use a new HTML element is to find a web page that uses the element, then use the 'View Source' option in order to examine the underlying HTML. This works great if you've got a simple example page, and if you can locate the HTML within the page.
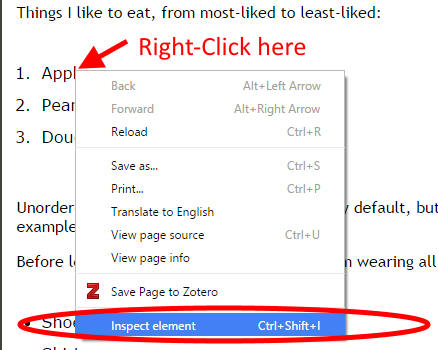
- Chrome: Inspect Element for more detailed 'explanation'
- The Chrome browser has a nice feature that will both show you
the HTML source code AND help you find a specific part of the page
within the HTML. If you want to see the HTML for the first
item in a list you can right-click on the item, and then select
'Inspect Element', as pictured here:
Once you do that you'll see the following. You'll notice that the item that you clicked on (the first item in the list) is highlighted in grey: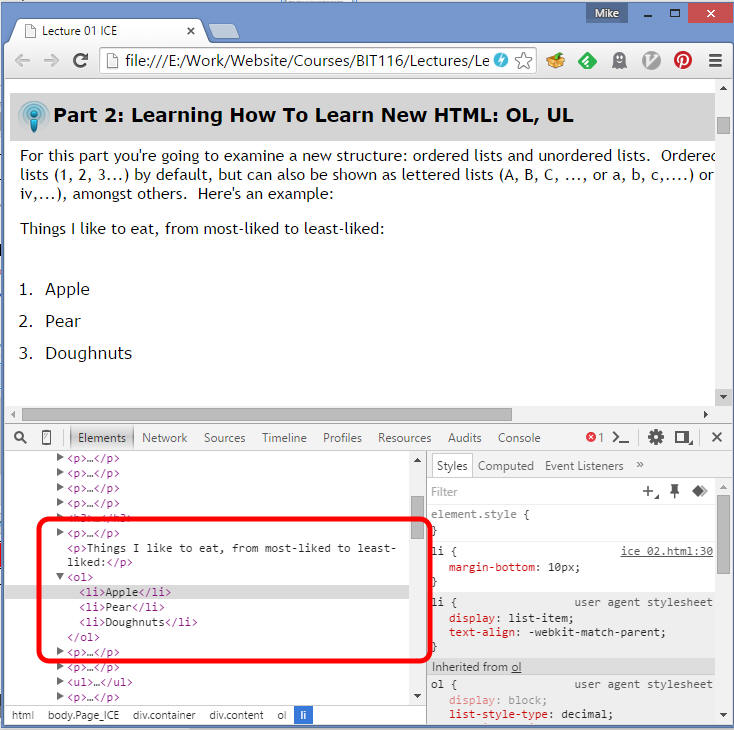
Using the 'Inspect Element' feature of Chrome will both show you the underlying HTML and will show you exactly which part of the HTML generated the list item that you're seeing on the page. 'Inspect Element' is a useful feature and you should take some time to play around with it and get familiar and comfortable with how it works - there's much, much more to the feature than what we just covered here! - Find some online tutorials on your own
- Once you know the name of the element you can try
Binging/Googling for online help. It's often helpful to tell
Google what technology you're looking at (HTML) and that you're
looking for something that will help 'walk you through' this.
A 'tutorial' is a document that shows you how to do something so
Googling/Binging for "HTML OL UL TUTORIAL" can sometimes produce
useful results.
It's worth pointing out that sometimes it's tricky to find a tutorial that's actually helpful. Sometimes the top-ranked results are hard to understand, or don't have enough material, or even aren't talking about the stuff you need help with. Indeed, just correctly identifying whether the tutorial is actually about the topic that you're looking for can sometimes be tricky.
Because of this I'd encourage you to thinking about finding useful tutorials as a skill in-and-of-itself, and therefore to keep practicing this throughout this course. - Tutorials on the W3Schools website
- Since this is a semi-independent learning process I'm going to
provide you with the following links to the W3Schools website.
W3Schools is a pretty good place to start - it's not super detailed
but it will get you up and running quickly.
W3Schools lists (note that this page contains a lot of details about stuff that we won't be looking at in this class - look at the material about "Unordered HTML Lists" and "Ordered HTML Lists" and ignore everything else) - Printed (or electronic) Books
- Even in the Age Of Teh Interwebs books are valuable resources.
Web pages tend to be good either for either orgizationally supported stuff
or stuff where an individual can spin out a page or
two in about 2 hours or less. An example of amazing,
orginizationally supported documentation check out the online Python
programming language reference. It's amazing, and maintained
by the people who maintain Python. Awesome pages that fall
into the second category include the numerous, numerous pages
wherein someone asks for help with a problem, and other people have
posted various trouble-shooting advice.
In contrast, books are good resources when you're looking for something comprehensive, something well-editted, and something that a team of people put a lot of work into developing. If you're having trouble with a particular area (such as HTML) and you're not finding what you want online then I'd recommend you go looking for books that can support you. Keep in mind, too, that you can find a lot of technical books in the King County Library System and Seattle Public Library system (for free!). Most of the Seattle Public Library technical books tend to be e-books, which you can check out and read on your e-reader (Nook, Kindle, Kobu, etc).
If you do find a book that you find useful the instructor would love to hear about it - please email the instructor to let him/her know!
The second step is to actually experiment with the new element. Create a small file that contains the absolute minimum of stuff inside it, and then add the new element that you're learning. Start with a simple example, possibly one that you've copied from an example website. Then start tweaking it and fiddling with it. Ask yourself 'Is it possible for me to do X?' and then see if you can. If you can then you're now able to do this new thing. If not then you konw that the technology can't do whatever you were trying to do, which is also very valuable knowledge.
It's worth pointing out that for HTML, CSS, and JavaScript there are lot of online tools that can make this step easier. In particular, the W3Schools website has a great 'Try It' button which can give you an example of minimal HTML source that generates the ordered/unordered list on the browser's web page. There are similar other websites out there (for example, there's JSFiddle for JavaScript) and you can Google around for more on your own.
For this exercise, you should practice 'learning how to learn' HTML, and do whatever you need to in order to learn the UL and OL elements.
Part
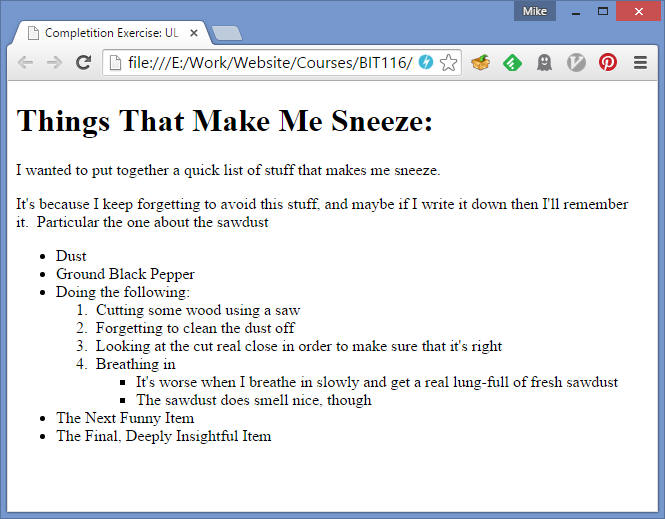
3: UL, OL: Recreate this (Completion) - H1...H6, P, OL, UL
Once you've done whatever learning that you need to in order to feel comfortable creating ordered and unordered lists you should download this partially complete starter file. Based on the image below you should complete the starter file so that your finished page looks the same as the image below.
Once you're done you're encourage to compare what you created to the example solution
Here's what the finished page should look at:
The image is just the stuff INSIDE this blue
box.
You are NOT expected to have a blue box on your web page!
 The image is just the stuff INSIDE this blue box. You are NOT expected to have a blue box on your web page! |
Part
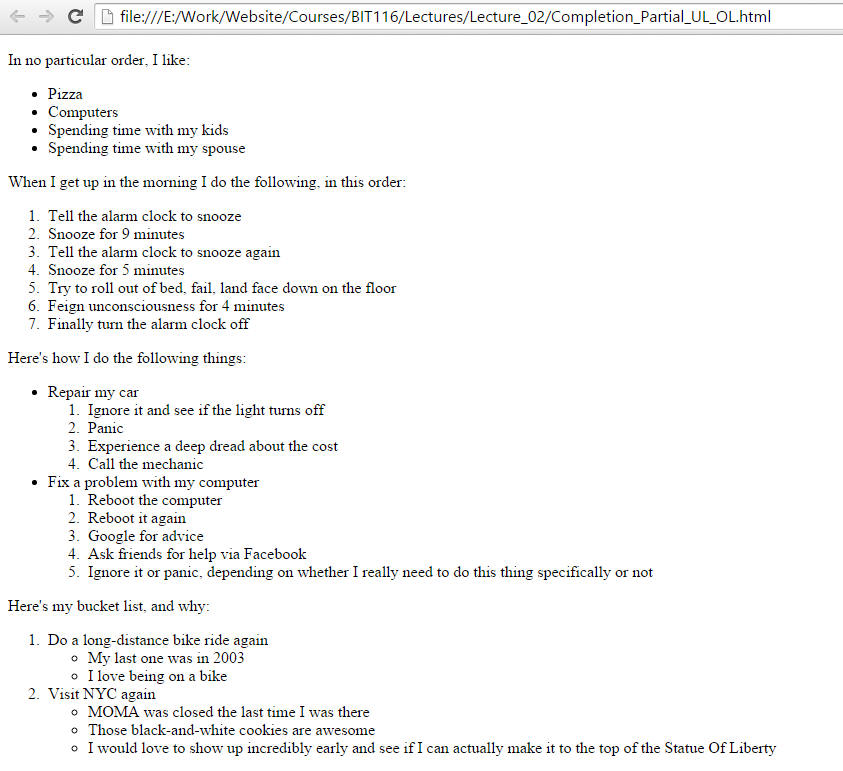
4: UL, OL: Recreate this! - H1...H6, P, OL, UL
- Find an appropriate, .HTML, starter file.
- Add whatever HTML elemetns to the file so that it looks like the
image below.
- HINT: The final page should contain P, H1, H2, etc elements along with the UL and OL elements
- Once you're done you're encouraged to check your work with this example solution.
- Here's the image. Again, ignore the blue border around the image
 The image is just the stuff INSIDE this blue box. You are NOT expected to have a blue box on your web page! |
Part 5: Fun With Computer-Generated Text, More UL/OL Practice (OPTIONAL)
- Do a Google search for the terms "Lorem ipsum" and go to one of the offered Lorem Ipsum sites like
http://www.lipsum.com,
http://www.ipsum-generator.com, or
http://www.blindtextgenerator.com
(just for fun you might want to do a search for "Pirate Ipsum" or "Bacon Ipsum"). Generate and copy a paragraph of "Lorem" text from the site and replace the word "Paragraph" in between the <p></p> tags. - Add another set of <p></p> tags and copy-paste a second paragraph there.
- Beneath the second paragraph, add <h2></h2> tags with the text Ordered List.
- Beneath the <h2> tags, create a <ol> ordered list with five <li> list items in it (e.g., Alpha, Bravo, Charlie, Delta, Echo).
HINT: You may want to look at the source code of html2.html Example File to see how this is done.
- Repeat Steps 4 and 5, but this time for an <ul> Unordered List.
HINT: You may want to look at the source code of html2.html Example File to see how this is done.
- Make sure to always File >> Save your work.
Part
6: Adding HTML Links
- Instructor Walkthrough
- Absolute link
- Create a new HTML file. Naming it something like Part_6_Links.html wouldn't be bad.
- Add the following three <a> links using
<a href="path-goes-here"> , link verbiage, and its closing
</a> tag:
Google - http://www.google.com
Yahoo - http://www.yahoo.com
Bing - http://www.bing.com
HINT: The instrutor will demonstrate this in-class. You can (and should) also look up any extra reference material that you need to in order to learn this topic well. - Add a <br> line break tag after the three links to display them on separate lines
- Relative link to a file in the same folder
- Next create another .HTML file, and make sure that you save it in the same directory. Naming it something like Part_6_Same_Dir.html wouldn't be bad.
- Within this new file put some quick HTML. The goal here is to put the minimum you can (so that this step is quick) but enough so that this page is unique and distinctive. That way when you try out the link from the main page it'll be clear that you have, in fact, gone to this new web page.
- Back in the original page put a relative link to the new file.
- Try out the new link in a web browser.
- Whenever you're learning something new you should always (always, always, always!) test it out in order to make sure that it works. Even if I don't tell you to do this step you should always do this!!
- Relative links to a file in a sub-folder
- Within the folder that contains your two files, create a new subfolder. Naming it extraStuff wouldn't be bad.
- Within your new folder create another .HTML file, and make sure that you save it in that new directory. Naming it something like Part_6_SubDir.html wouldn't be bad
- Within this new file put some quick HTML. The goal here is to put the minimum you can (so that this step is quick) but enough so that this page is unique and distinctive. That way when you try out the link from the main page it'll be clear that you have, in fact, gone to this new web page.
- Back in the original page put a relative link to the new file.
- (You did test out the new link in a web browser, right? And you made sure that this new link goes the new file, and not back to that second file you created, right?)
Part
7: HTML Links
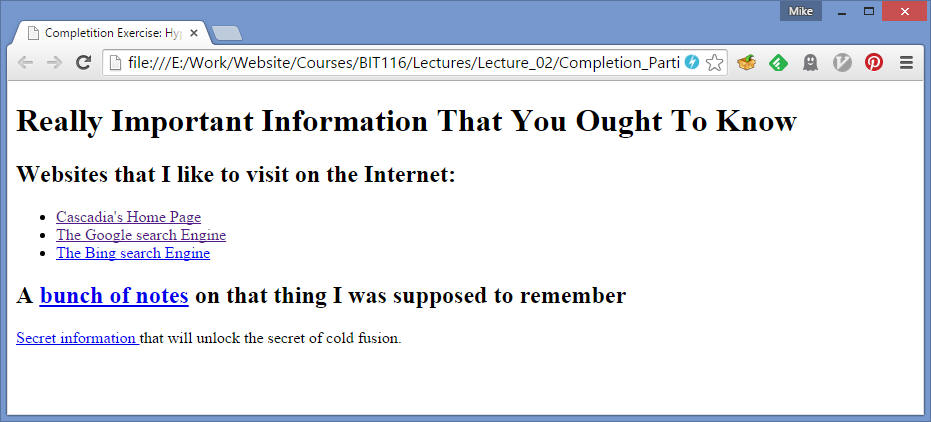
- Recreate This - Completion
Once you've done whatever learning that you need to in order to feel comfortable creating hyperlinks in HTML you should download this partially complete starter file. Based on the image below you should complete the starter file so that your finished page looks the same as the image below.
Once you're done you're encourage to compare what you created to the example solution
Here's what the finished page should look at:
The image is just the stuff INSIDE this blue
box.
You are NOT expected to have a blue box on your web page!
Note the first three links go to:
- http://www.cascadia.edu
- http://www.google.com
- http://www.bing.com
The next link goes to a file named OtherFile.html in the same directory, and the last link goes to a file named OtherOtherFile.html, in the folder named SupportingMaterials. You should create those files (so that your links actually work! :) ), but you can put anything you want into those files.
 The image is just the stuff INSIDE this blue box. You are NOT expected to have a blue box on your web page! |
Part
8: Recreate this: now with images!
Given this image, recreate an HTML page that looks reasonably close to it.
By 'reasonably close' what I mean is that you DO NOT need to get h1, h2, etc exactly right, but you DO need to get them relatively right (I.e., if the first heading is bigger than the second, h1 & h2 are ok, as are h2 & h3, h1 & h3, etc)
You'll need to figure out how to use images in HTML. Based on what you learned about learning HTML in the prior sections you should be able to do this on your own in this section. If you get stuck first ask the people sitting near you and then ask the instructor
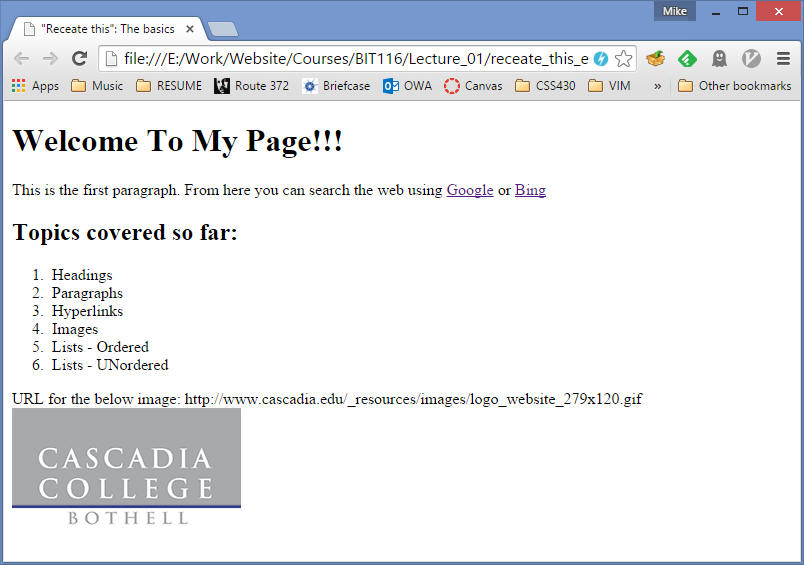
(For DOCTYPE just use the HTML5 "<!DOCTYPE HTML>")
DO remember to include the head & body; if no title is specified then you can pick one yourself.
Part
9: Example Solutions for the above exercise, and HTML comments
Here is one version of HTML that will produce something 'close enough' to the above image that it would count for full credit in an exam situation
Here is another version of an HTML document that would also get full marks in an exam situation. In order to see the differences in these two documents you'll need to look at the HTML source.
You'll notice that the second example include several HTML comments. Much like Java comments in your BIT 115 class these are notes left by the HTML author for other HTML authors (other humans) to read, but your browser will ignore them when rendering the page. More detail on HTML comments is found at:
Part 10: Semi-Independent Exploration:
Here's an image of a web page that contains several parts that we haven't looked at in lecture, on purpose. (It also contains several items that we have looked at.) The goal for this exercise is for you to do whatever research you need to in order to figure out how to create the HTML that can reasonably generate the image you see.
NOTE: The width & height below are measured in pixels.
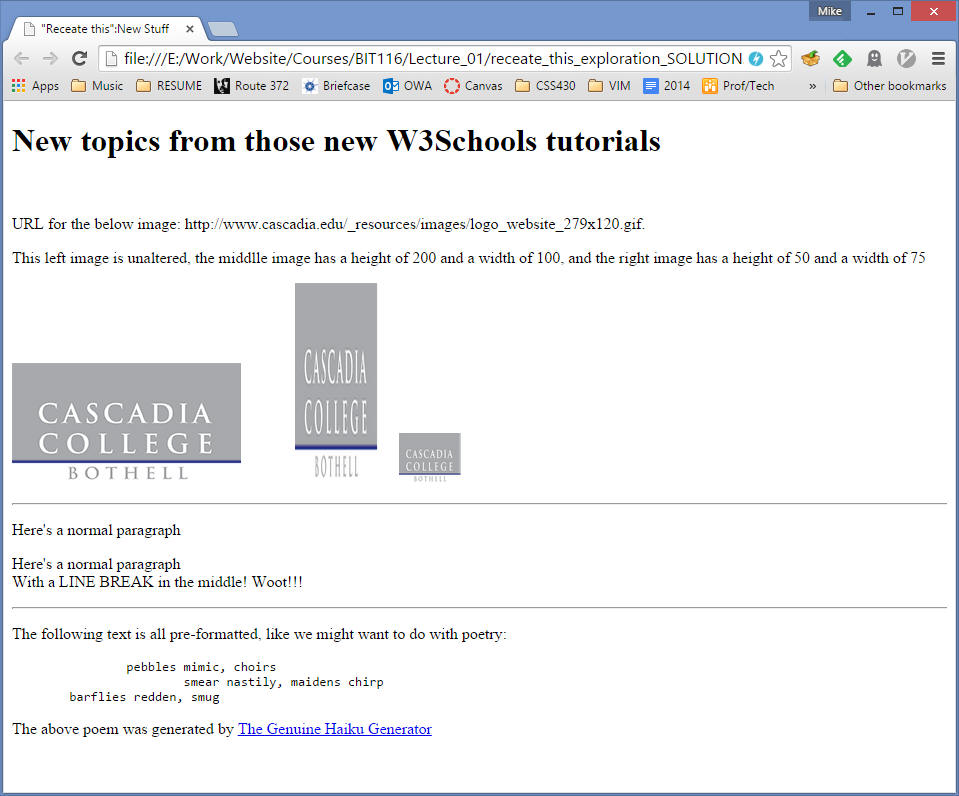
In order to make this a semi-independent exploration (instead of a fully independent exploration) I've listed some tutorials from W3Schools, below. You should find everything you need in the following tutorials. Be warned, though, that the tutorials may contain extra information about other stuff, which we won't use to make this exercise's page (so if you see something in a tutorial and don't understand how to use it in your page don't panic - just remember it in case it's useful later and keep reading.
As a final hint, the stuff that's new in the web page follows the same order as the following tutorials. So the part of the page which has the same image displayed several times (but different sizes each time) uses information from the first tutorial that's listed here:
It looks like the 'Genuine Haiku Generator' is down - there are several other options for finding poetry generators on the web :)
Part
11: Example Solution for the above exercise, and HTML comments
Given an image, recreate a reasonable representation of it
Here is one version of HTML that will produce something 'close enough' to the above image that it would count for full credit in an exam situation
Part
12: Building Your Own Personal 'Quick Reference' sheet HTML rules & elements
Go back through the previous exercises and build up a list of HTML elements along with a quick note for yourself about what each one does. You should also build up a list of relevant HTML rules (stuff like "Don't forget to start with a DOCTYPE, like this: <!DOCTYPE html>", etc).
While the instructor may check your work on this exercise the primary purpose is to provide you with a list of topics to study, so that you can get this information into your own head. As a side-benefit you will end up producing your own, personal 'quick reference' 'cheat sheet' for HTML.
(If you're curious you can search the Web for 'HTML quick reference' and 'HTML cheat sheet' to find interesting examples of what other people have done. Please do feel free to make use of these, but be warned that such things are typically aimed at people who are already familiar with much more HTML than us. So - use them if they're useful, and ignore them if they're not).
IMPORTANT DISCLAIMER: While the instructor reserves the right to change the parameters of quizzes and exams at his/her discretion, you should assume that you will NOT be allowed to bring a cheat sheet into any quizzes, nor into the exams.