Pulling Your Repo From GitHub:
The goal for this exercise is to make sure that you can download ("pull") changes from GitHub back to your computer
What you need to do for this exercise:
- In the previous exercise you added a file to your repo on GitHub.
This is great, but it does raise the question: how do I get my changes from GitHub back to my computer?
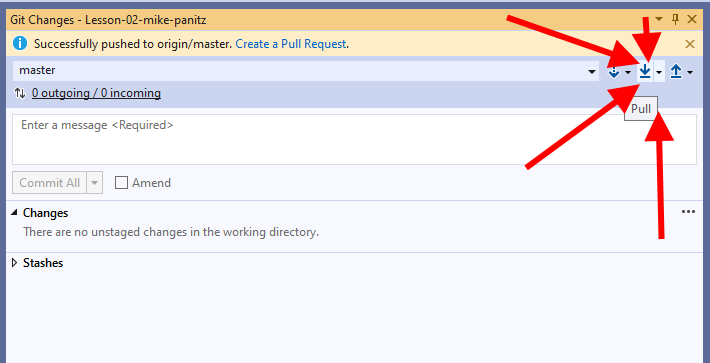
We'll look at that in this section - .In Visual Studio please open the Git Changes panel, then click on the 'Pull' button:
WARNING: There are two buttons with down arrows on them. The Pull button is the middle-most button, and it's down arrow is a solid line (note that the left-most button has a dashed line instead).
If you hover your mouse over the Pull button then the word 'Pull' will appear, as pictured below:
- At this point you should be able to see the file that you added on
GitHub:
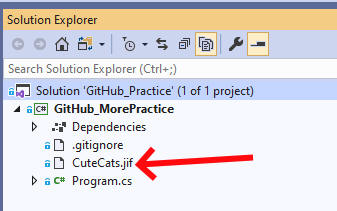
- At this point you need to open up the Solution Explorer (You can use the View --> Solution Explorer menu item to do this), then take a screenshot showing that your file has been added, then you need to add that screenshot to your repo. You can do this locally using Visual Studio or online using GitHub.com. If you add the file locally then make sure to Push your changes back up to GitHub