Deleting A File From The GitLab Server
Goal: In this exercise you will familiarize yourself with the process of removing a file from your repo on the GitLab server.
You must do this exercise first so that the changes you make at the end of this exercise will be downloaded in the next exercise.
Deleting (Removing) A File From GitLab
Occassionally you may want to remove (delete) You may want to remo
Once you've added a file to your git repo it's very hard to remove it. This is especially true if the file has been there for several changes (for several commits).
After you delete a file it will appear to be removed, but the file will still exist in the project's history. You (or someone else) can still find it by clicking on the Commits link in the left-hand column of GitLab and going backwards until they find a commit that still had the file in it, and then asking git to show them the project at that point in time.
This behavior is exactly what you want - if you accidentally delete a file you can still go 'back in time' and find it.
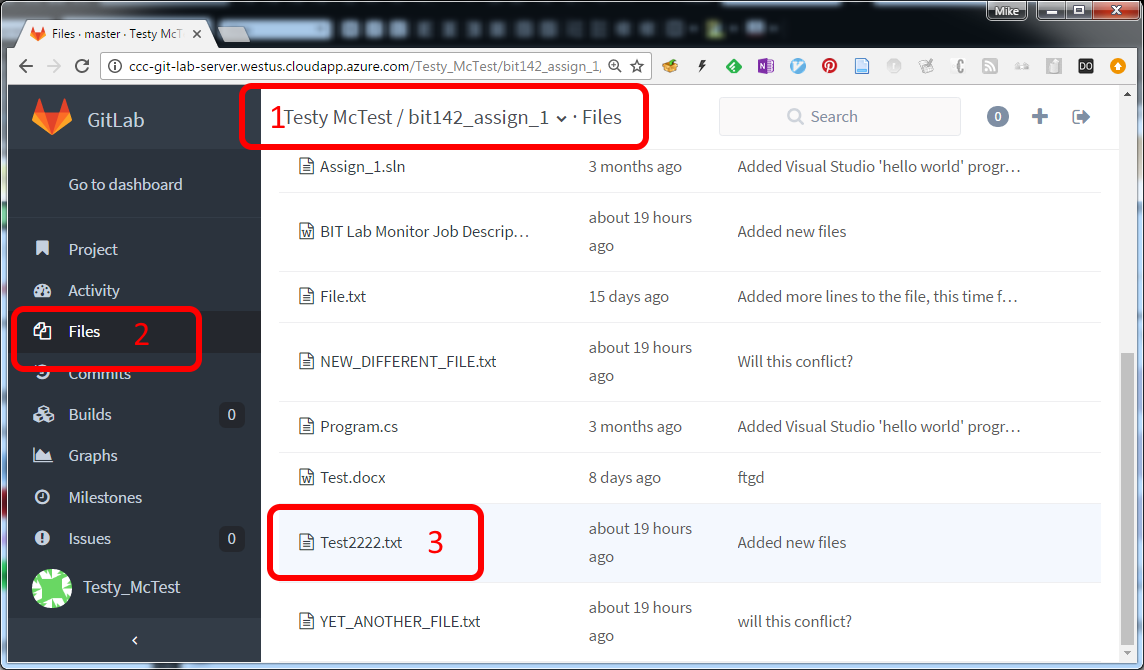
In GitLab, you should click on the name of the repo that you wish to add a file to ( this is (1), in the image below). Within a specific project, you should click on the Files tab in the left-hand column (this is (2), in the image below). Then click on the specific file that you want to remove ( (3), below).
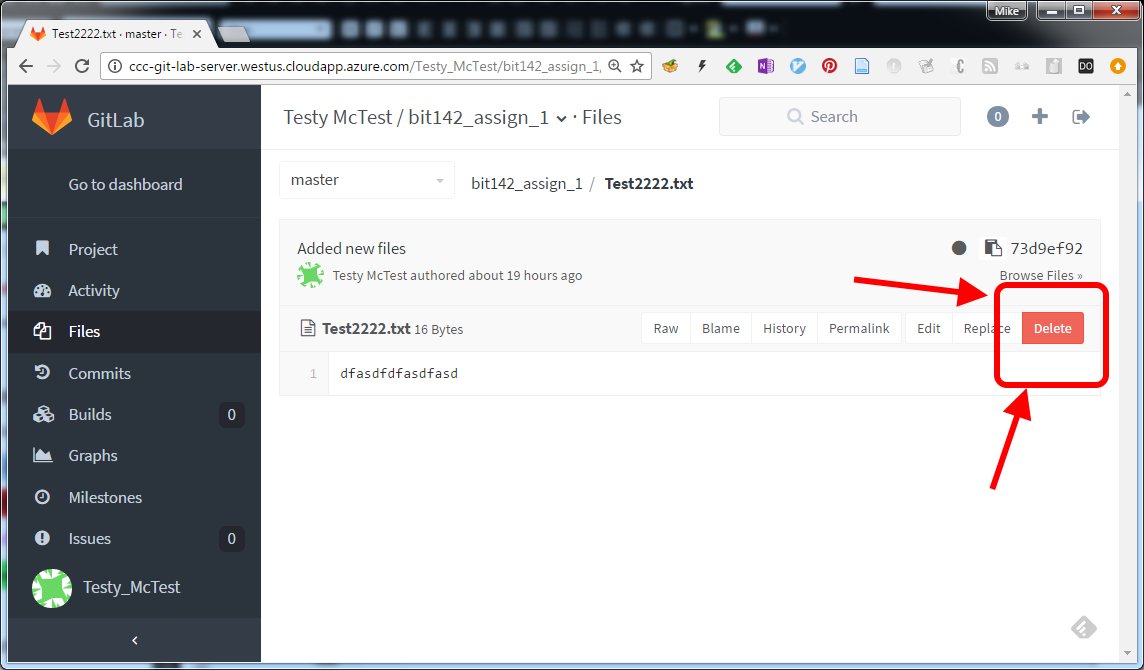
Once you've opened up the file on GitLab you can delete (remove) it, using the delete button:
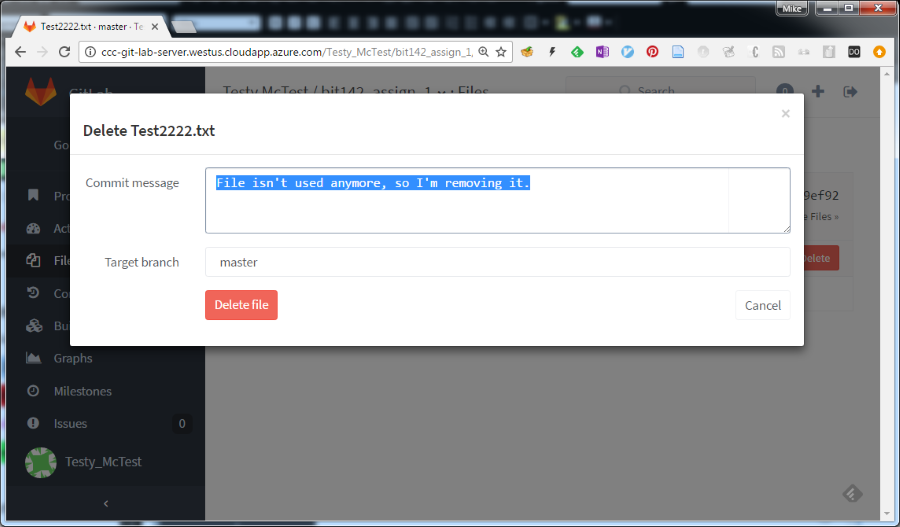
Like any other change you want to make to your repo on GitLab, you'll need to provide a commit message before pressing the 'Delete' button.
It's a good idea to briefly explain why you're deleting the file, just in case a coworker comes along and wonders why the file is gone: