Adding A File To Your Local Repo
Goal: In this exercise you will familiarize yourself with the process of adding a new file to your local repo, using GitKraken.
In this exercise you will download your copy (including those changes) and you will continue to modify it.
You must finish the previous exercises first so that the changes you make at the end of those exercises will be downloaded in the this exercise.
Adding a file to your local repo
(Adding a file to the project on
your computer)
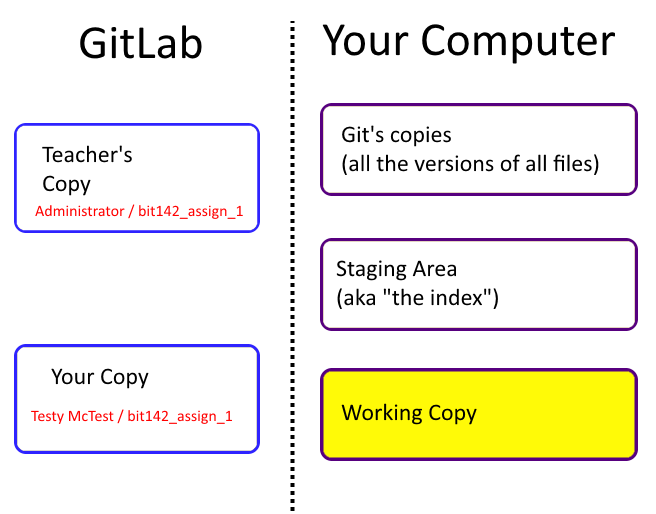
It may be necessary to include brand-new files in your repo. A previous tutorial explained how to upload a file to the GitLab server. In this tutorial we're going to add the file to your local repo (your copy of the project that's on your computer). Once the file addition has been commited you can then push your project/repo to the GitLab server just like normal.
The first step is to start GitKraken.
The second step is to find the Working Copy's folder/directory. (Remember that there's instructions on how to find your working copy in a previous exercise).
At this point you should put a new file into the Working Copy folder. Typically you'd create a new file in your IDE (for example, in Visual Studio) but you can also move a file you've already got into the directory, too (for example, you could move your Viewing Quiz into the Working Directory).
Once you've done that the main panel will change,and you'll see the WIP: line at the top of your list of commits. This time you'll see a green square to indicate that you're trying to add a file (pictured in box 1, below).
Once you click on the top line you'll see the Unstaged Files, Staged Files, etc appear at the bottom of the screen.
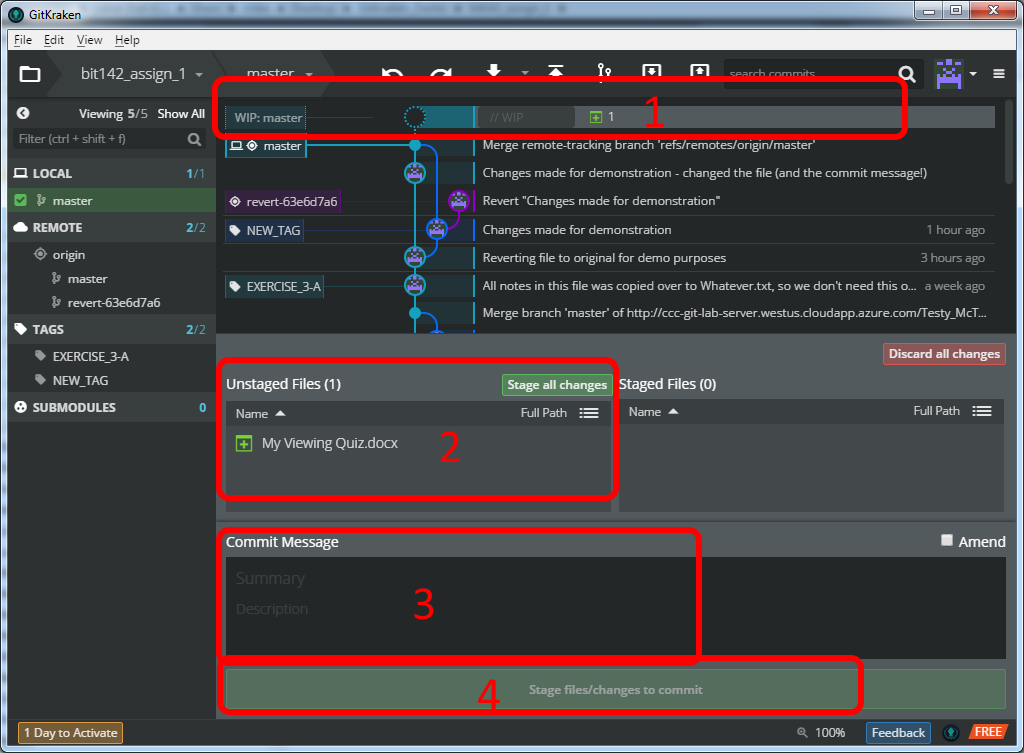
Just like for a normal commit you'll need to stage the file(s) (box 2), then type in a commit message (box 3), and finally commit the changes to your local repo (box 4).
Before you commit your changes: if you click on the new file while it's still in the Unstaged Files or Staged Files list GitKraken will attempt to show you the contents of the file. This will work great for source files (since they're stored in text files), but for a binary file (for example, with your .DOCX Word file) you'll see something like this:
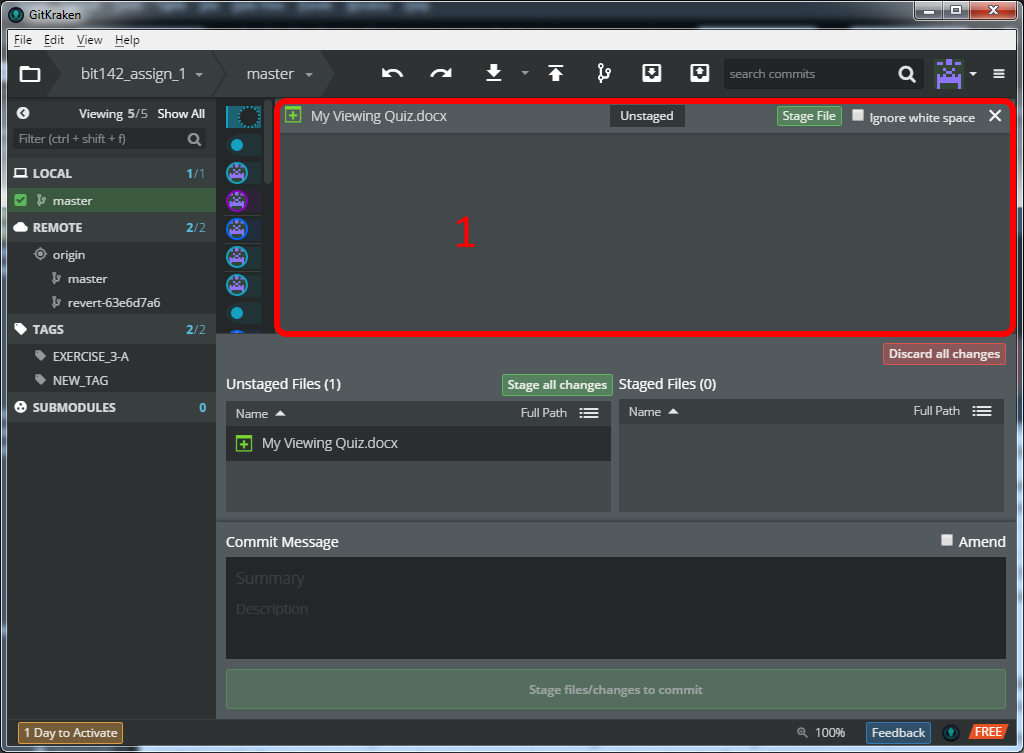
Notice that box 1, which normally shows you the file contents, is empty. Git is pretty amazing in a lot of ways, but it generally doesn't display any files other than text files. This is fine (GitKraken is not Microsoft Word, after all) so don't worry about it.
Confirm that the changes are on the server
At this point you should log into the GitLab web site/web app, click on the name of the repo that you just pushed, then click on the Files tab in the left-hand column (this is (2), in the image below). You should see the file listed in the main panel on the right.
If you don't see the files on the server you should double-check that you actually pushed the changes back to the server, much like you did in a previous tutorial.
If that doesn't fix it then you should spend some time troubleshooting the problem yourself. If you can't figure it out after 20-30 minutes (and it's fine if you can't) then please seek help from someone else (e.g., classmates, study buddies, the BIT Open Lab tutor, the instructor, etc)