Uploading (Adding) A File To The GitHub Server
Goal: In this exercise you will familiarize yourself with the process of adding a new file to your repo on the GitHub server.
You must do this exercise first so that the changes you make at the end of this exercise will be downloaded in the next exercise.
Uploading A File To GitHub From Your Computer
It may be necessary to include brand-new files in your repo. For example, you might create additional code in another source code file. Or you may need to include a Word document that contains your Viewing Quiz/Video Outline. Regardless of the details, the basic outline is the same:
- Create (or find) the file that you want to include
- Decide whether you're going to upload your work to GitHub directly OR use Elegit to include the file in your local repo.
We haven't talked about how to use Elegit yet so for this topic we'll look at how to upload directly to GitHub, instead.
However, if you modify your local copy (on your computer) and you ALSO modify the repo on GitHub this may cause problems.
Before you modify anything on the server make sure that you've uploaded ("pushed") all your local changes back to GitHub (and then download/pull the repo back to your current machine after changing the copy on GitHub).
In GitHub, you should open repo that you wish to add a file to. Within that specific repo/project, you should click on the button labeled "Upload files", as indicated in the picture below:

Once you click on the button you'll be brought to a new page where you can upload your file(s):
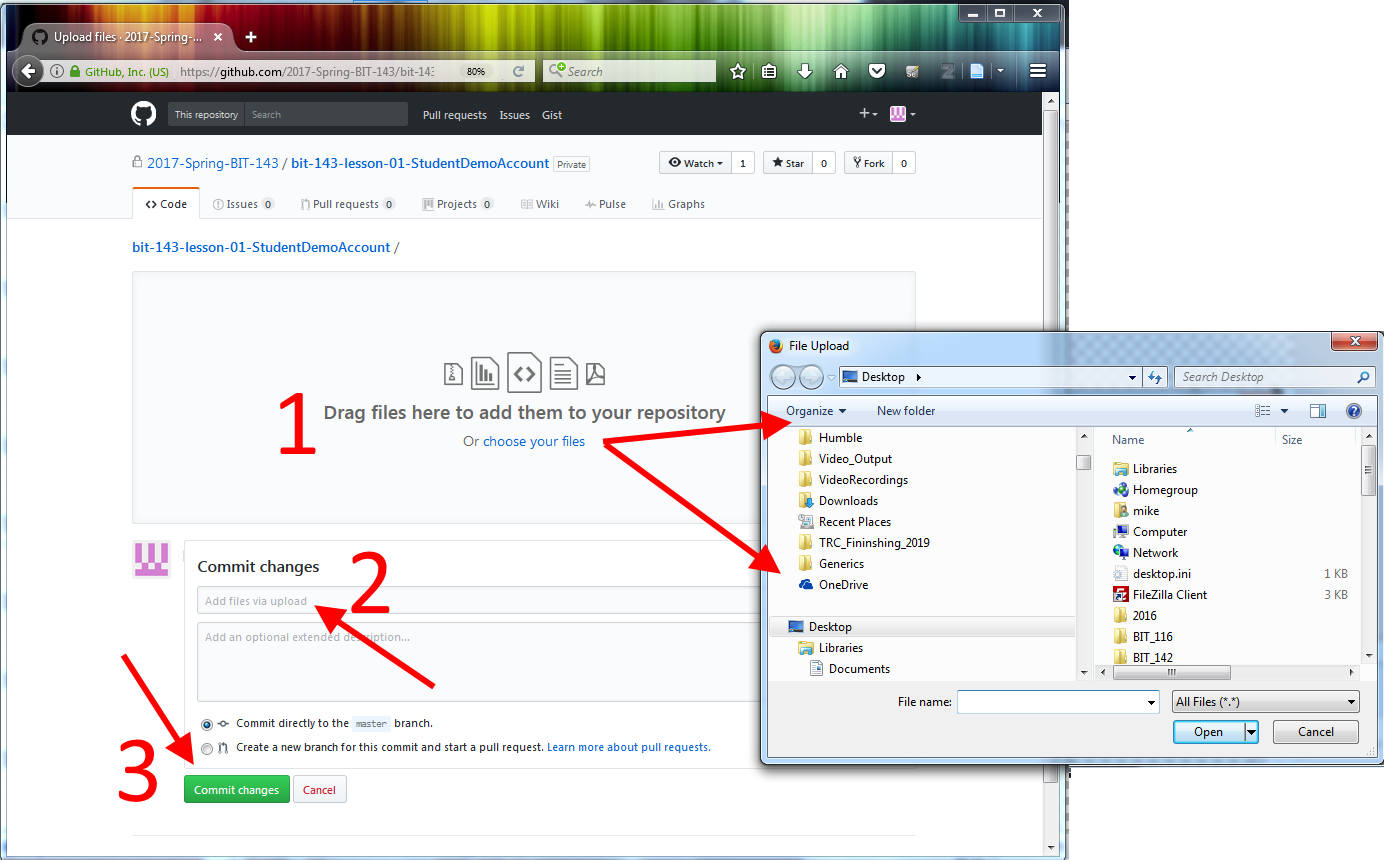
The first thing you need to do is to tell your browser which file(s) you want to add. You can do this by switching to your operating system (such as Windows) and then dragging-and-dropping the file(s) onto the box with the large '1' on it. Alternately, you can click on the 'choose your files' link to open up a normal 'File Upload' dialog box (pictured above, at the ends of the arrows that start at the 'choose your files' link).
Once you've picked your file(s) to add, you need to write a short commit message in the box pointed to by the '2', above. Since git can list the files you added it's generally best to pick a short, conceptual summary of what the files contain, rather than listing the files themselves. For example, if you've traced through several programs and you're uploading all the Word .DOCXs files at once a good message might be "Added manual trace files for programs 1 - 3".
One way in which your instructor will assess your ability to use git and GitHub is by checking that you've been able to do specific actions. The instructor may look for a commit with a specific message in order to verify that you were able to do these things when you needed to. Because of that you may be required to use a specific commit message for a particular exercise. Read through each exercise and notice if the exercise requires you to use a specific commit message or not.
Once you've picked out the file(s) you want to upload and written a short commit message you should click on the 'Commit Changes' button (next to the '3', above) in order to actually upload and save the file(s) into the repository.
Note: by default GitHub suggests that you 'commit [save] directly to the master branch'. You should do this and NOT create a pull request.
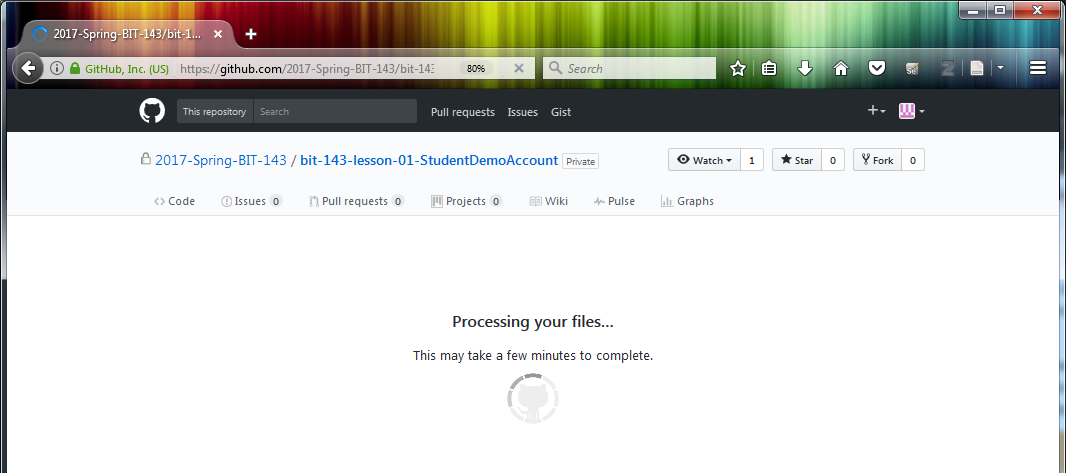
Once you've clicked on the 'Commit Changes' button you'll see the following page, telling you that GitHub is working on uploading your files. If you've got a lot of files, or a big file, or especially if you've got a lot of big files this may take a while:
Whenever you're learning something new you should always find a way to double-check your work. We can do this by going back to the 'Code' page for our repo and seeing that the file has been added:
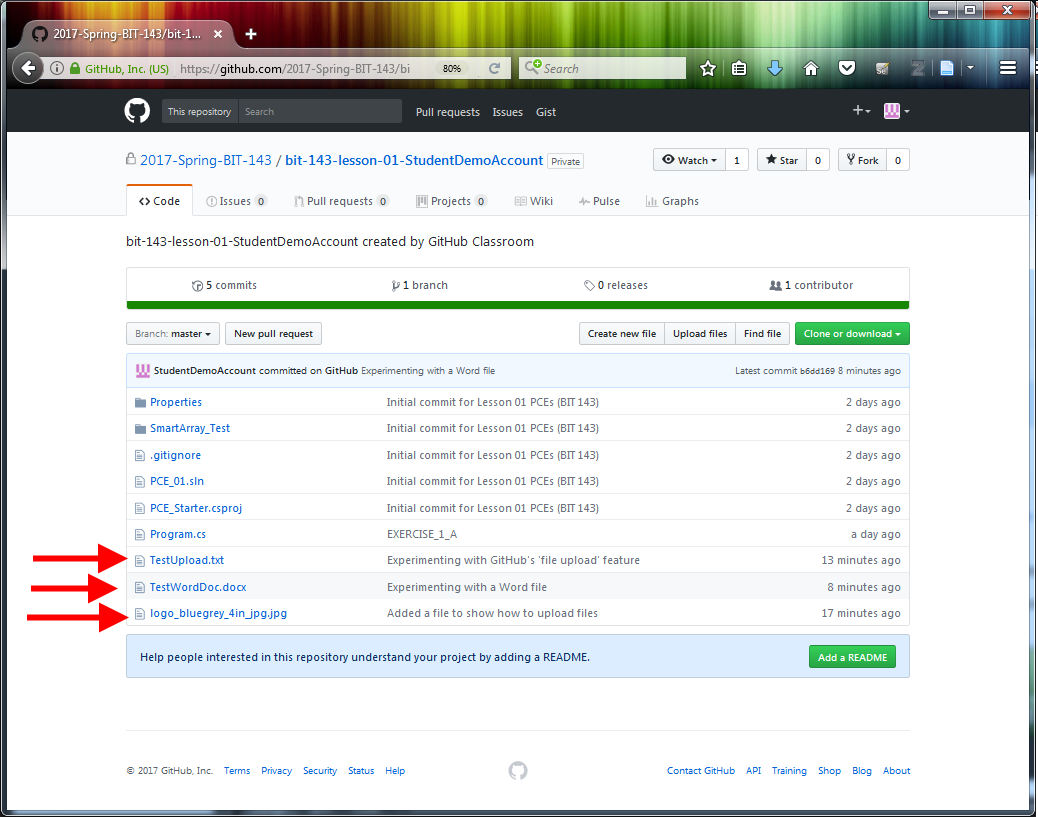
In this case I added "TestUpload.txt", "logo_bluegrey_4in_jpg.jpg", and "TestWordDoc.docx" to the repo. I can see them listed in the above image, so clearly something got uploaded. However, how do I know that I uploaded the correct file? How do I figure out if I accidentally uploaded the wrong file?
In addition to checking that there's a file with the correct name we can also verify that the contents of the file are correct by clicking on the name of the file (next to the red arrows in the above image). If you click on the TestUpload.txt link/name, you'll be brought to this page:
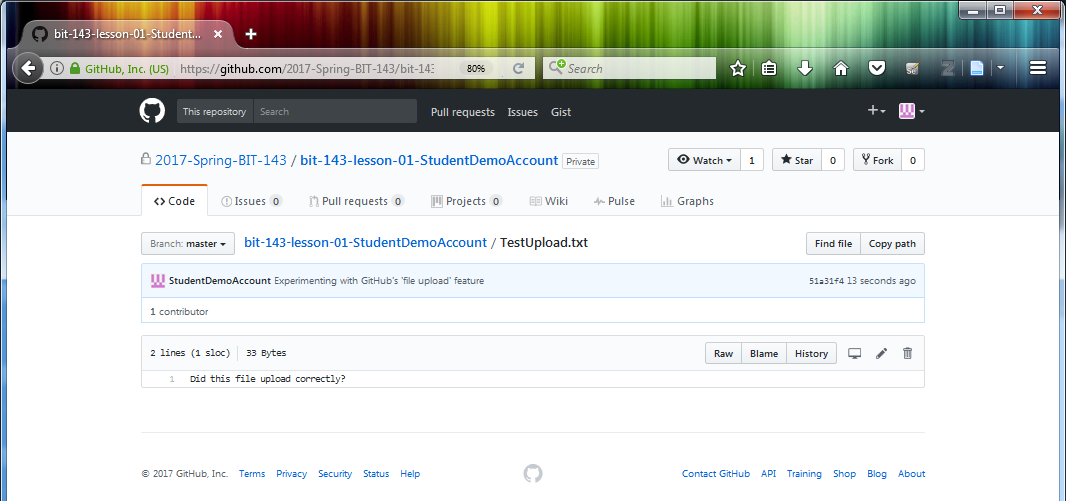
As expected, this is the correct contents of this file.
You should experiement on your own with other file types - can you upload and then view image files? Visual Studio Solution files? Visual Studio Project files?
One file type that I want to specifically talk about is the Microsoft Word file type. When you upload such a file and then click on it to see the contents you'll be shown:
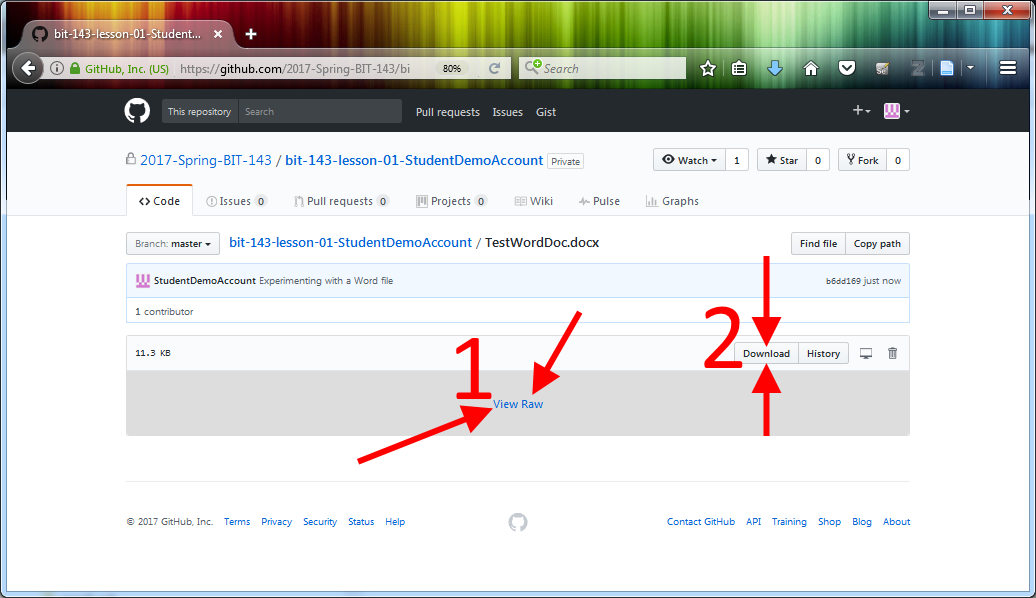
Notice how GitHub is not showing you what's inside the file on the website. However, you are always responsible for making sure that you're handing in the correct file, so you need to double-check what you've uploaded.
You can do this by clicking on the 'View Raw' link (next the '1', above), or the 'Download' button (next to the '2', above). Either one will prompt you to download the file somewhere on your computer. Once you've downloaded the file you can then open the file in Word and verify that it contains the correct contents.