Editing A File On The GitHub server
Goal: In this exercise you will familiarize yourself with the features of the GitHub web application (web site), so that you can do some simple things entirely online (without having to make a copy on your local machine).
You must do this exercise first so that the changes you make (after doing the exercise for this topic) will be downloaded in the next exercise.
Overview
In this tutorial you will log into GitHub, make a copy of the starter project, make sure that you can find your project again, and edit a file within your copy of the starter project. All of this will be done online.
You're expected to try and make progress even if the pictures aren't identical (just like you'll be expected to first try and fix your own problem when working in industry). As always, if you get stuck please seek help from the instructor.
(If the images below are wildly different from what you're seeing please contact the instructor - it may be that something big has changed since this tutorial was created)
Edit A File
The final step is to edit a file on the server. In the left hand column (in the above picture) you should click on the link labeled 'Files' (in the picture, '2' points to this link).
You'll then see something that looks like the following:
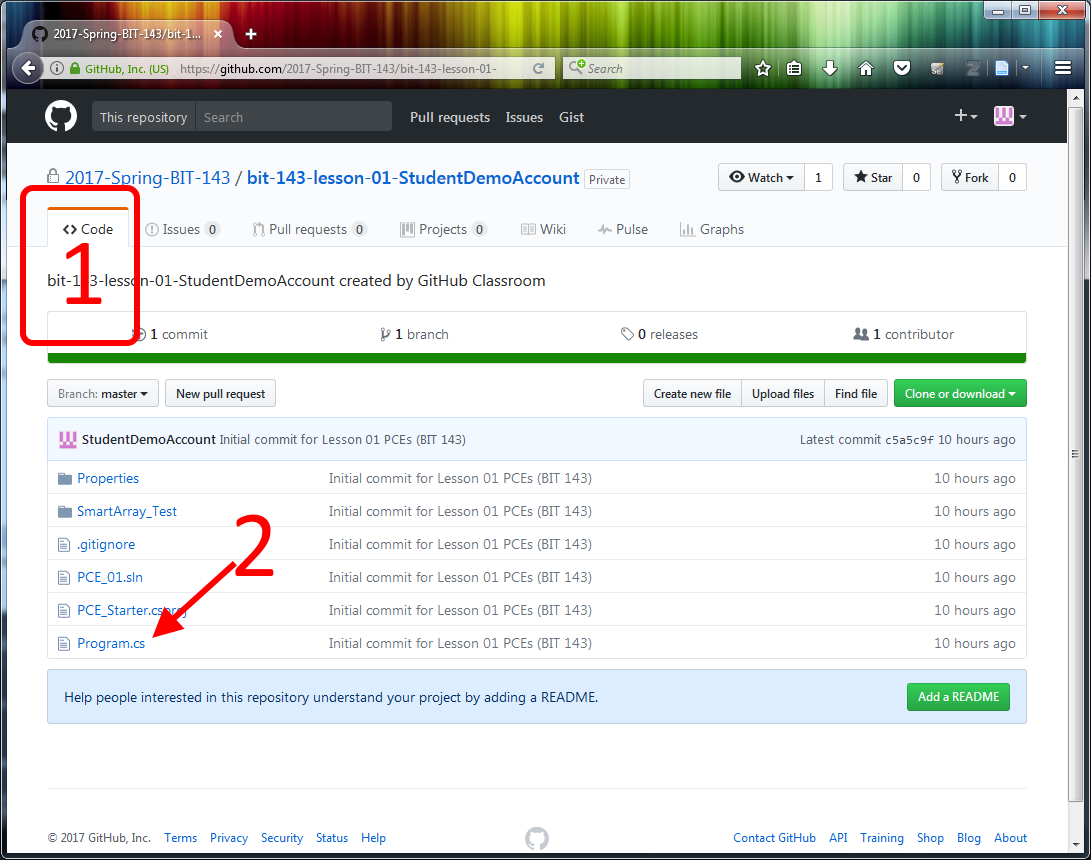
If you want to view (or edit) a particular file you click on it's name. In the above picture, if you wanted to edit "Program.cs" you can click on it's name (the '2' points at Program.cs).
In order to edit the file you need to click on the button labeled 'Edit', pointed to by the arrows in the below picture.
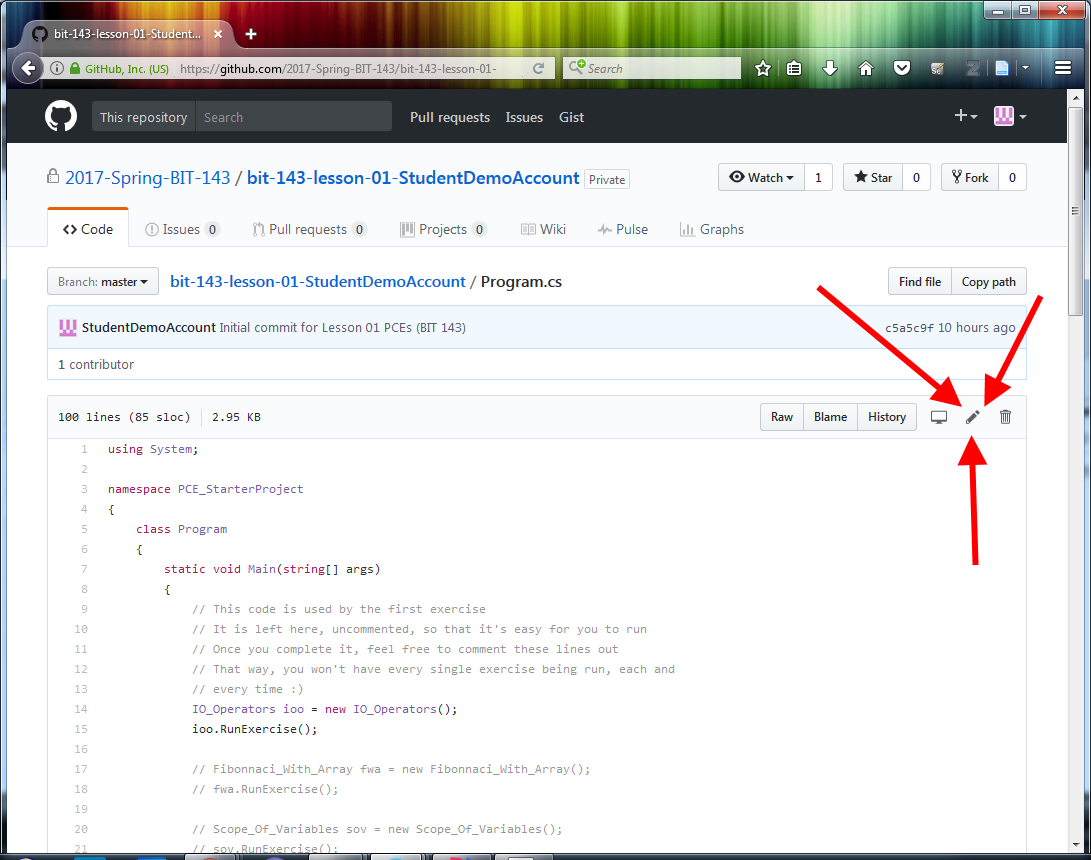
After you click on the 'Edit' button you should see the following:
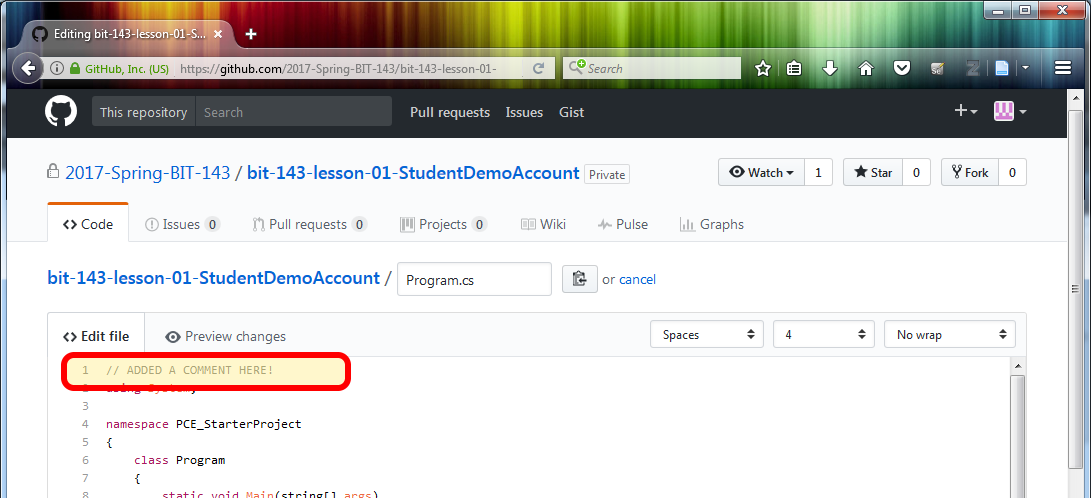
Please add a comment in the highlighted box (like we did here)
Next, commit (save) your change:
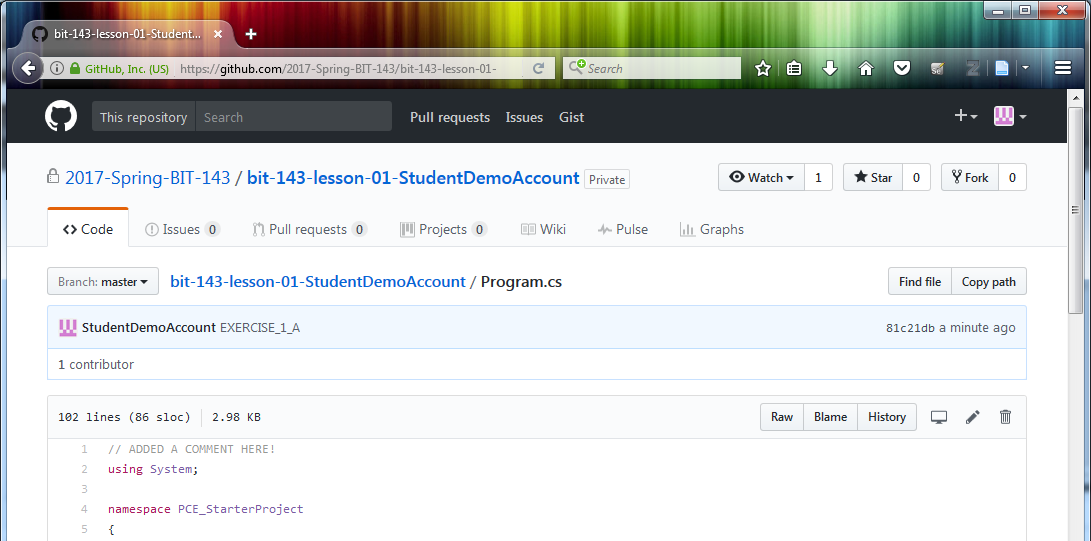
If everything worked you'll be able to see the change:
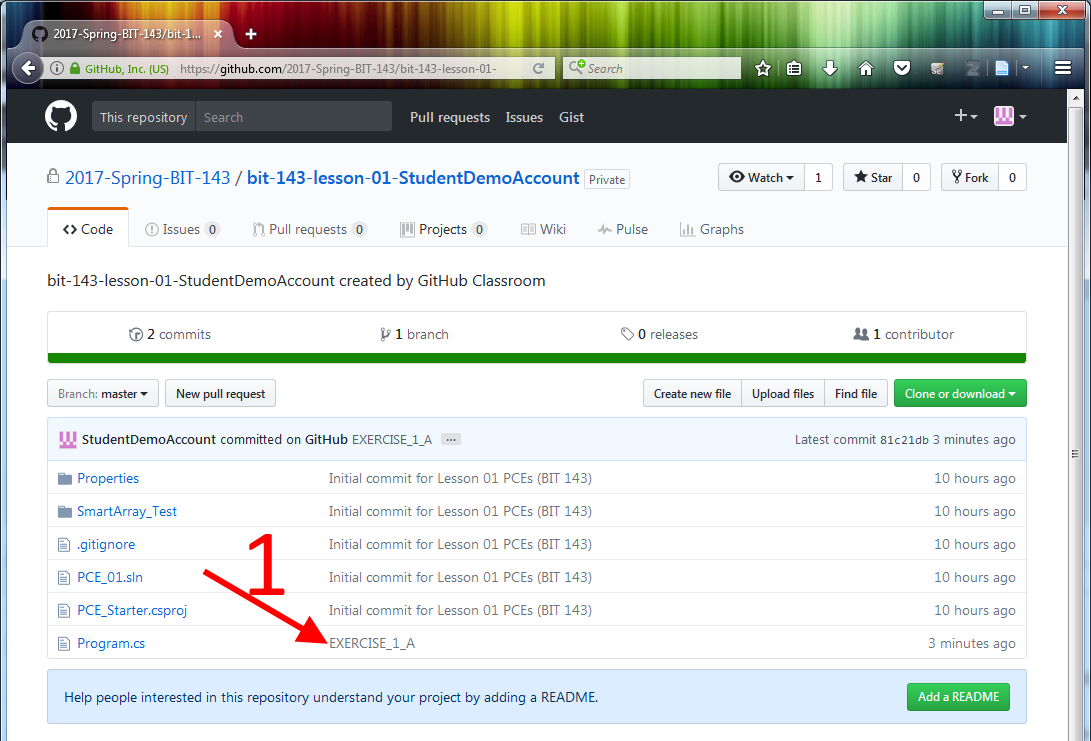
Go back to the repo page by clicking on the link (in the above picture)
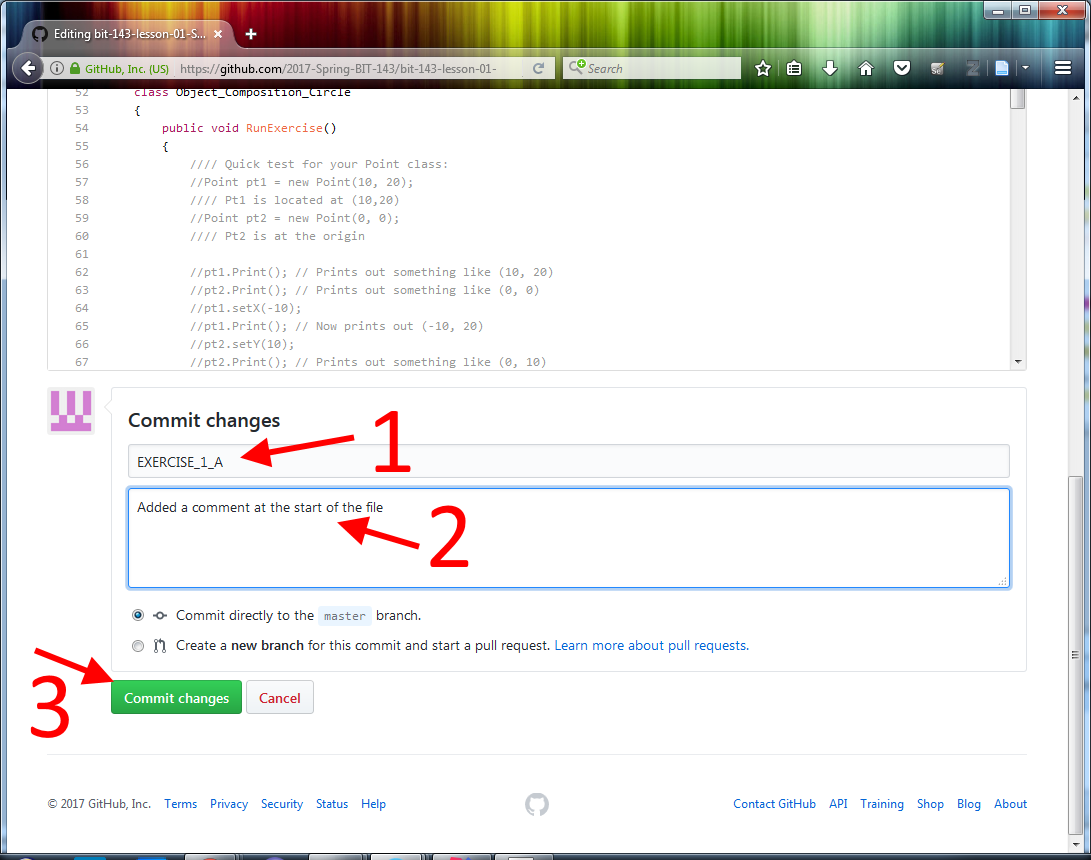
You can make changes by clicking in the large textarea box pointed to by the '1' arrow.
NOTE: For this exercise please add your changes at the END of the file so it's super-clear what your changes are.
You won't be allowed to store your changes (to 'commit' your changes) until you enter a short message that describes what your change was. You can do this by typing something into the 'Commit Message' box (pointed to by '2')
Lastly, you can store your changes by clicking on the labeled 'Commit Changes' (pointed to by '3'). In the above picture that button is dimmed because there's no Commit Message (i.e., the box pointed to by the '2' is still empty), but it will become active once you add a commit message.
After successfully committing (storing) your change you should be brought back to the page which shows you the contents of your file. You should see the changes that you made in the file.