Getting Started With GitHub.com
Goal: In this exercise you will create an account on GitHub.com AND you will do some actions that are specific to this class in order to get started using GitHub.com.
You must do this exercise first so that the changes you make (after doing the exercise for this topic) will be downloaded in the next exercise.
Overview
In this tutorial you will log into GitHub, make a copy of the starter project, and then make sure that you can find your project again. All of this will be done online.
You're expected to try and make progress even if the pictures aren't identical (just like you'll be expected to first try and fix your own problem when working in industry). As always, if you get stuck please seek help from the instructor.
(If the images below are wildly different from what you're seeing please contact the instructor - it may be that something big has changed since this tutorial was created)
Logging in, first impressions
The first thing you need to do is to visit the GitHub.com web site and create an account for yourself. To do that, follow this link: https://github.com/ . You should then see a page that look similar to this:
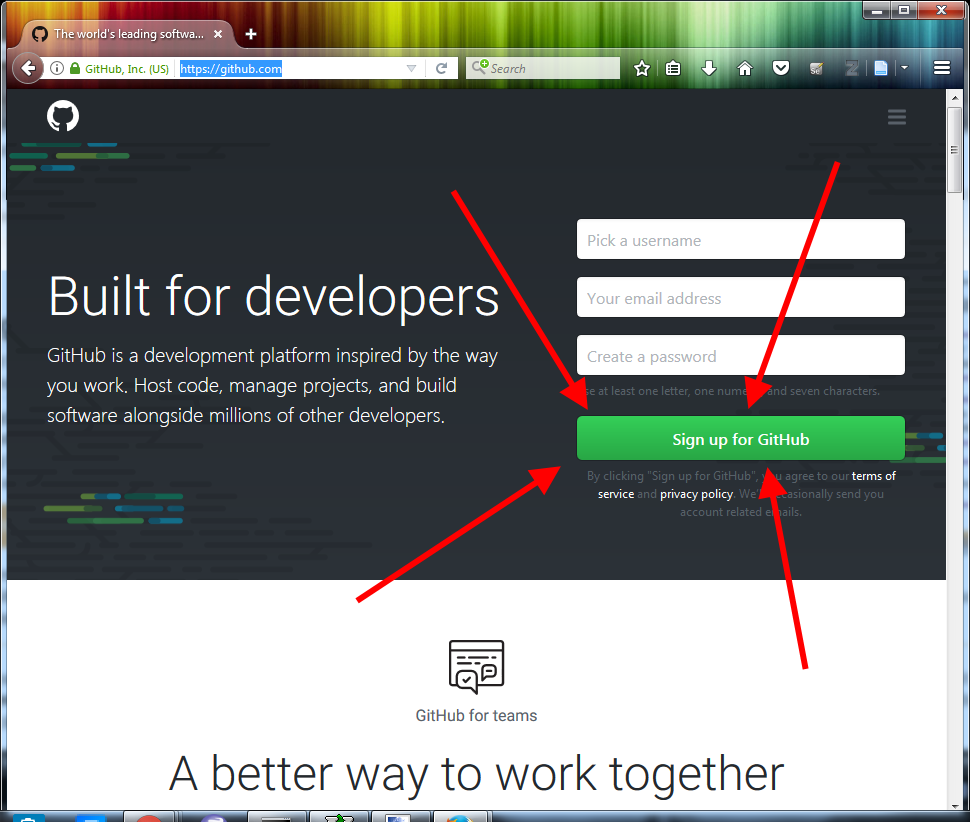
Once you've navigated to the web pate you should look for a link / button that says something like "Sign up for GitHub" (in the picture above, there are giant red arrows pointing to the button). From that point you should be able to figure out how to sign up for a free GitHub account; please contact the course instructor if you have any problems and/or questions.
NOTE: For this course you should use a FREE GitHub account. You do NOT need to pay monthly fee to use this online service.
Once you've created a new account you will automatically be logged in. You should then see something like the following:
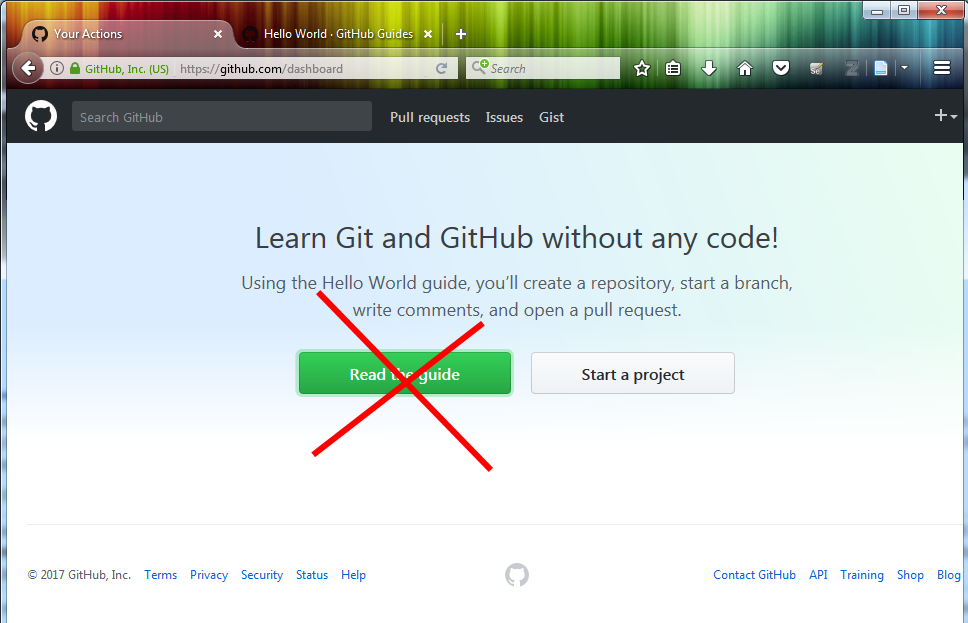
While you're welcome to look at the "Read the guide" link on your own (in case you want to use GitHub on your own), please do NOT read it right now. It walks you through creating a public repository on GitHub which you will NOT do for this course. So while you're free to read it later I recommend skipping it for now so it doesn't confuse you.
Warning: Do NOT
publically post your work on the Internet!
Please remember that
you are NOT allowed to publically post your work on the Internet.
Doing so (whether or not anyone else uses it) is an instance of academic
misconduct and will trigger the "Academic Misconduct" penalties described in
the course syllabus!
Note that GitHub will send you an email (in order to verify that your email is a valid address that you actually have access to). You should check your email, find the email that GitHub sent, and confirm your address so that GitHub can communicate with you this way if it needs to (for example, if you've forgotten your login information - the instructor cannot help you if you lose your GitHub.com login information).
All the starter projects for this course are kept in a special part of GitHub called an "Organization". Each class has it's own Organization (so BIT 142 will have a separate Organization from BIT 143, for example), and each quarter the instructor will have to make a new organization for each class.
You cannot get access to your class's Organization unless the instructor invites you. In order to invite you to join the class organization you need to provide the instructor with your GitHub username. In order to verify that you're actually enrolled in Cascadia's system you also need to provide the instructor with your first and last names. In order to do all that you will need to fill out a Google form with all that information.
Please go to https://goo.gl/forms/o44qSgO4Eux6JFI52 and fill out that form with the required information.
IMPORTANT NOTE: Your instructor
will add students to the BIT 143 organization (in GitHub) periodically and
NOT instantaneously.
It may take several days for the instructor to add
you to the organization, during which you may be unable to make progress on
these PCEs. Specifically, the instructor (in
general) will not be adding students to the Organization over the weekend.
In fact, if you don't leave enough time you may not get access at all before
the deadline falls.
MAKE SURE TO LEAVE SEVERAL DAYS OF TIME FOR
THE INSTRUCTOR TO ADD YOU TO THE CLASS IN GITHUB!!!
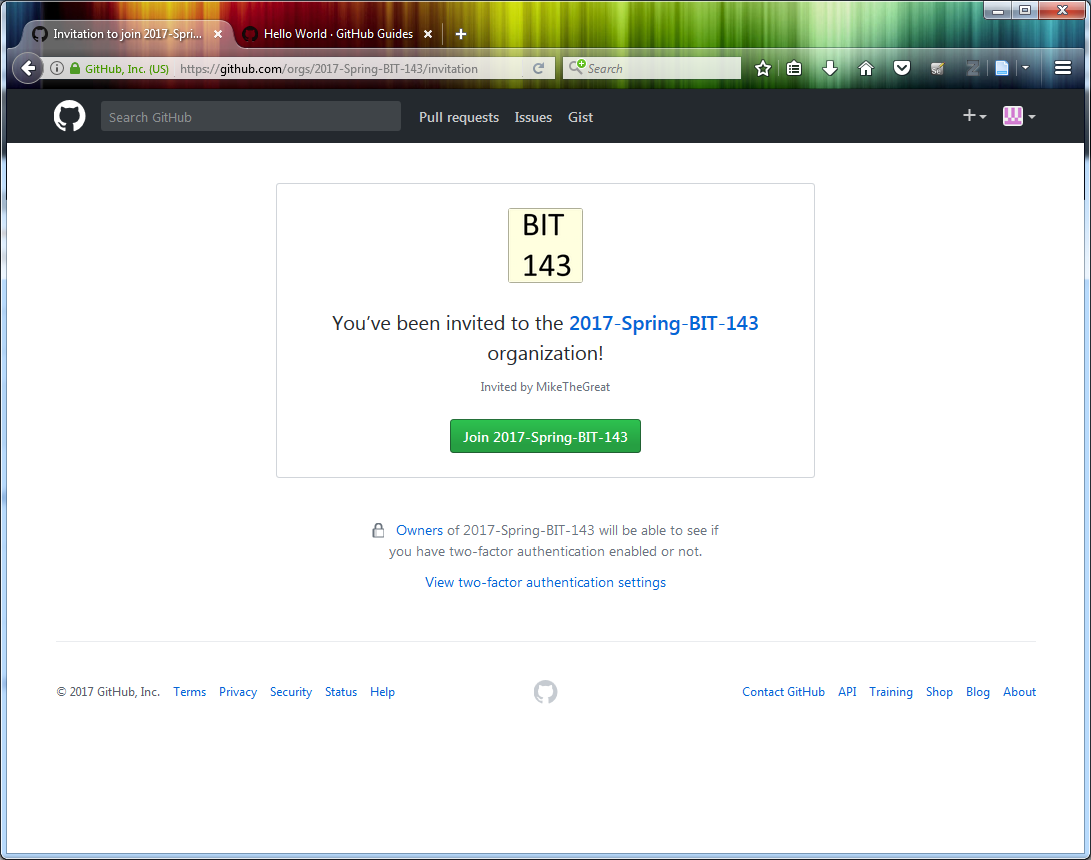
After you've added your name, email address, and GitHub username to the form the instructor will be able to invite you to join the GitHub Organization for this class. Once you get the email inviting you to join (note: this will be sent to you from GitHub, NOT from the instructor) you can click on the link in the email and you'll be brought to a page that looks like this:
At this point you should find the link for the assignment on the main page for this lesson.
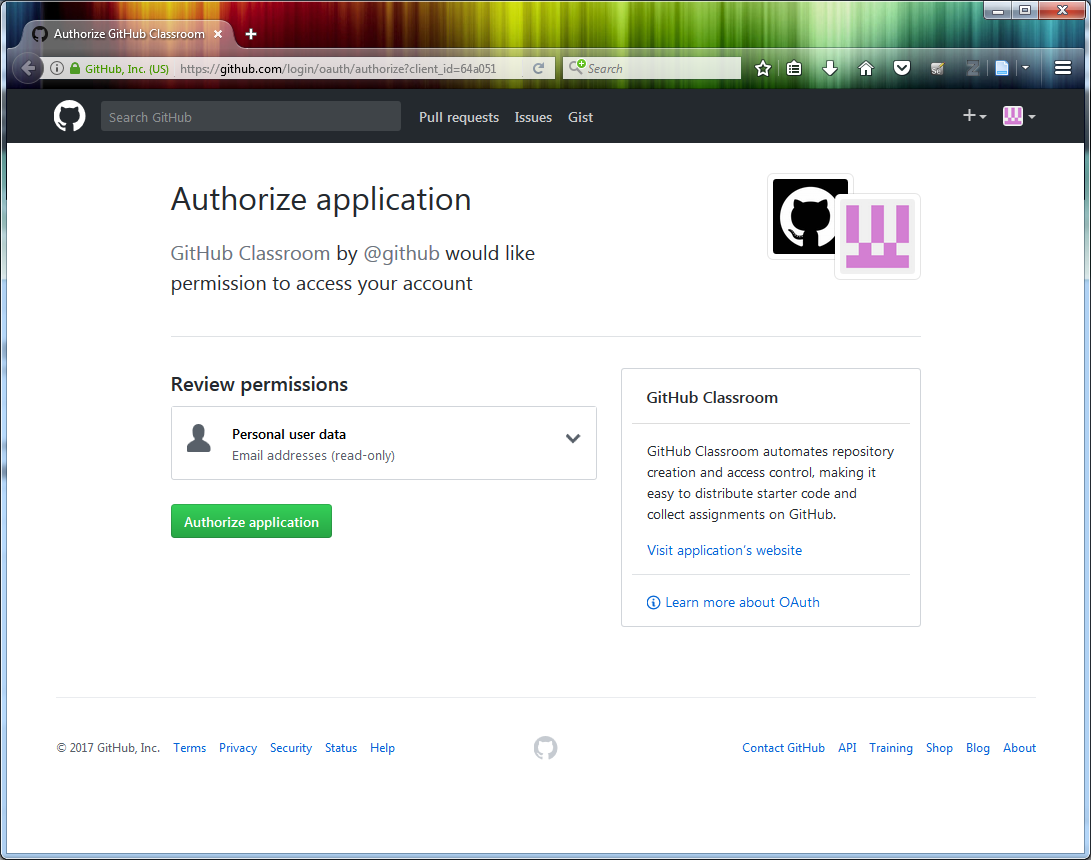
Follow that link and you'll be prompted to allow "GitHub Classroom" to
access your account.
(Note: This should only happen the first time you
visit classroom.github.com )
Then you'll need to accept the assignment invite:

At this point you've accepted the assignment - GitHub gives you a confirmation and then provides you with a link to follow to get to it:
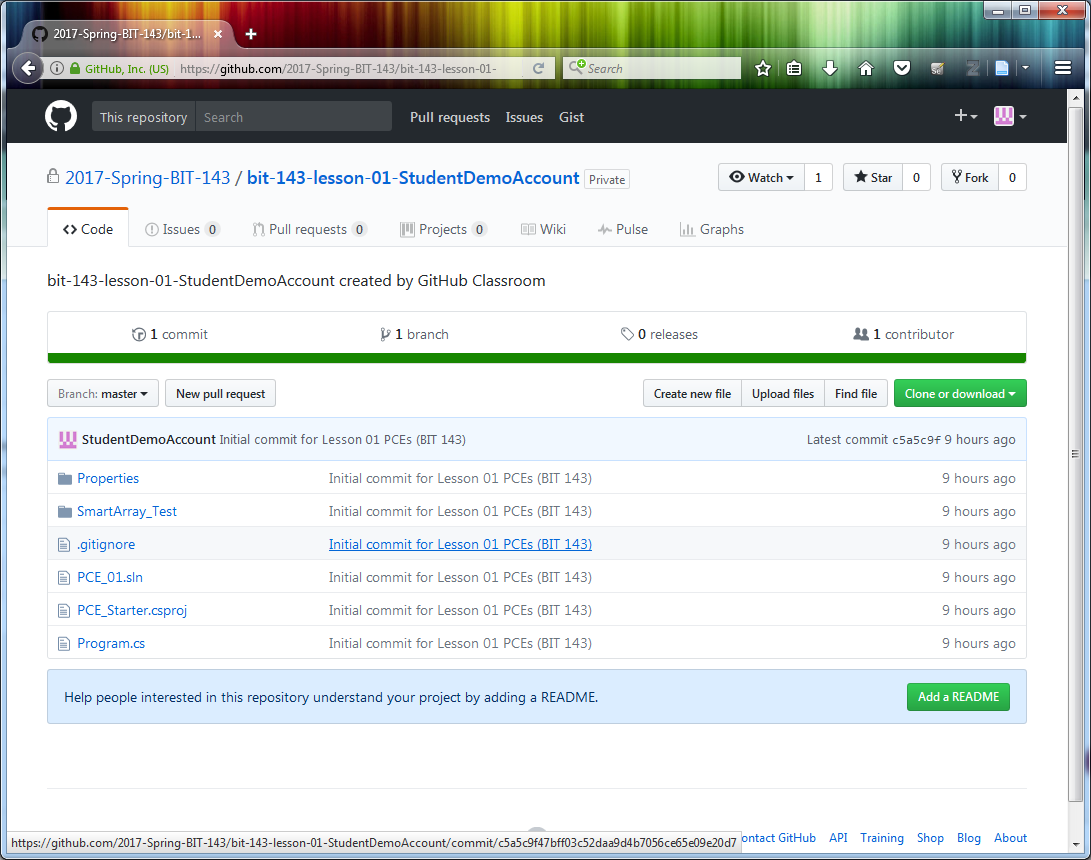
Note: At this point the student's project is visible on the instructor side
Fork a repo on GitHub
Once you've logged into our private GitHub server and looked around, the next step will be to make a copy (a 'fork') of the starter project for yourself on the GitHub server.
Let's start this by clicking on the name of the project that we want to
copy. In the above picture this is
Administrator / bit142_assign_1 (pointed at by the '2').
After you've done that you should see something like the following:
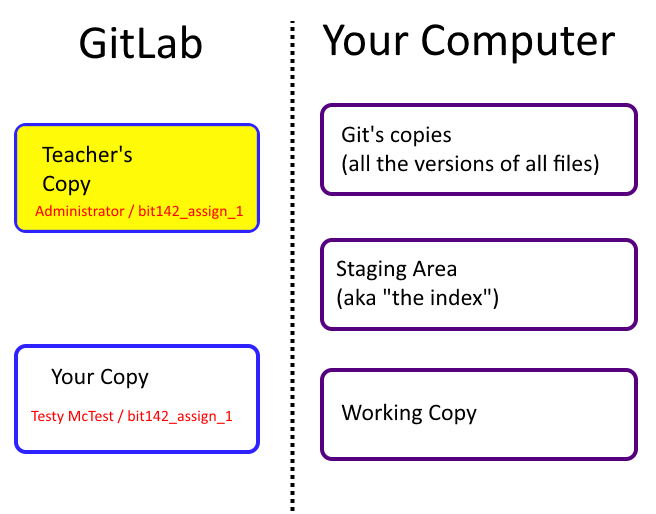
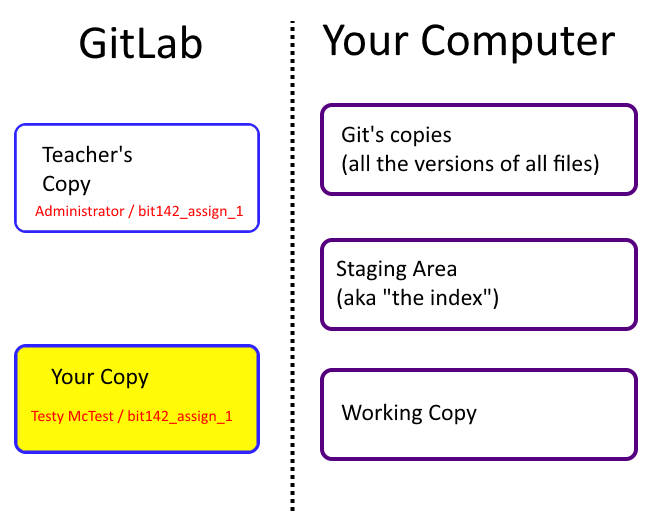
This means that in order for you to work on the starter project on your own computer you will need to go to the original copy that the instructor uploaded to the Administrator account, make a copy of that (by forking it), and then clone it to your local machine. This means that each student will see 3 copies of the project: the original, their forked copy on GitHub, and their local copy on their own computer.
Give this some thought now so that it's easier to remember which copy you're working on later.
Finding this project again in the future
Before we go on to the next task let's make sure that you can find the correct project again the next time you log in. This is important because you now have access to two projects: the original one that the instructor made, and your own personal project that you just forked.
Let's see the list of these projects by clicking on either 'Go to dashboard' or the word 'GitHub' in the above picture (next to the '3'). Either one will take you back to the dashboard, which shows you the list of projects that you have access to. Your list should look similar to the following:

The most important thing to notice is that you now have access to two, similarly named projects:
Administrator / bit142_assign_1is the original project made by the instructor. You're not allowed to change this project, and GitHub should be set up to prevent you from changing it.
(If you find that you can modify the starter project please inform the instructor immediately!!!)Testy McTest / bit142_assign_1is your own, personal copy of the project. You're fully able to change this project.
Go back to your personal project by clicking on the link labeled
Testy McTest / bit142_assign_1.
Edit A File
The final step is to edit a file on the server. In the left hand column (in the above picture) you should click on the link labeled 'Files' (in the picture, '2' points to this link).
You'll then see something that looks like the following:
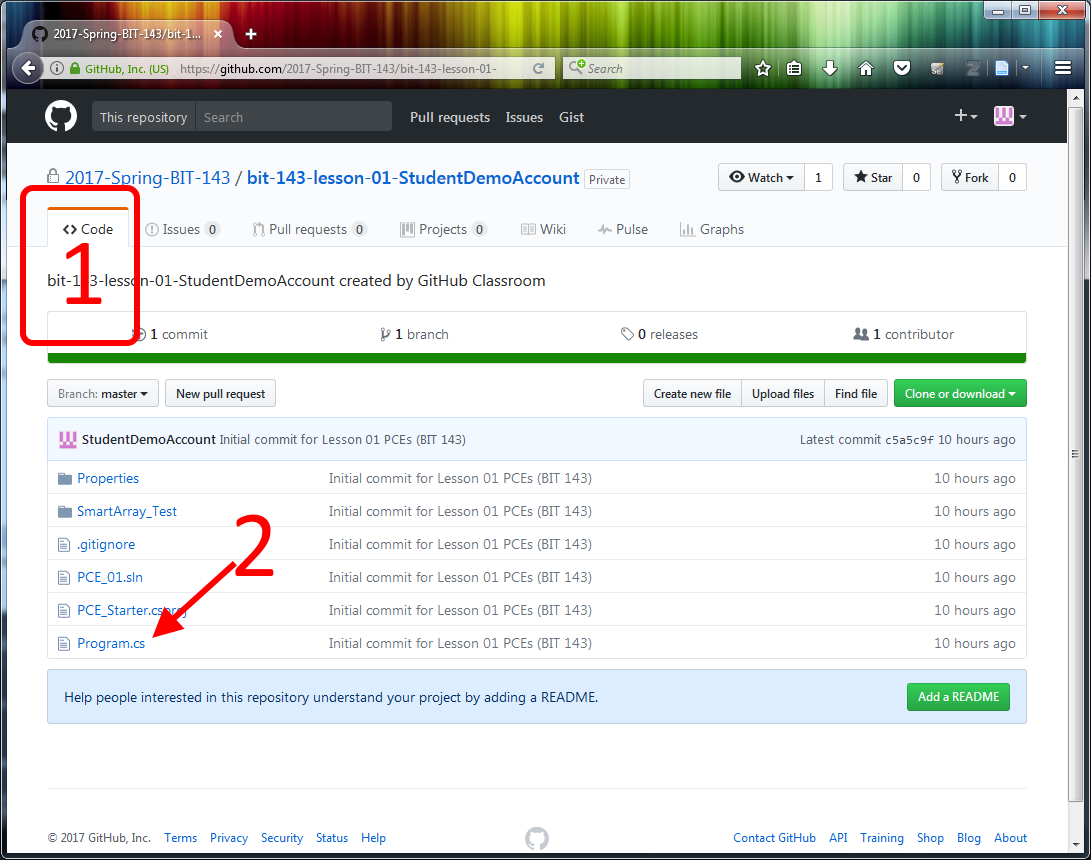
If you want to view (or edit) a particular file you click on it's name. In the above picture, if you wanted to edit "File.txt" you can click on it's name (the '1' points at File.txt).
In order to edit the file you need to click on the button labeled 'Edit', pointed to by the arrows in the below picture.
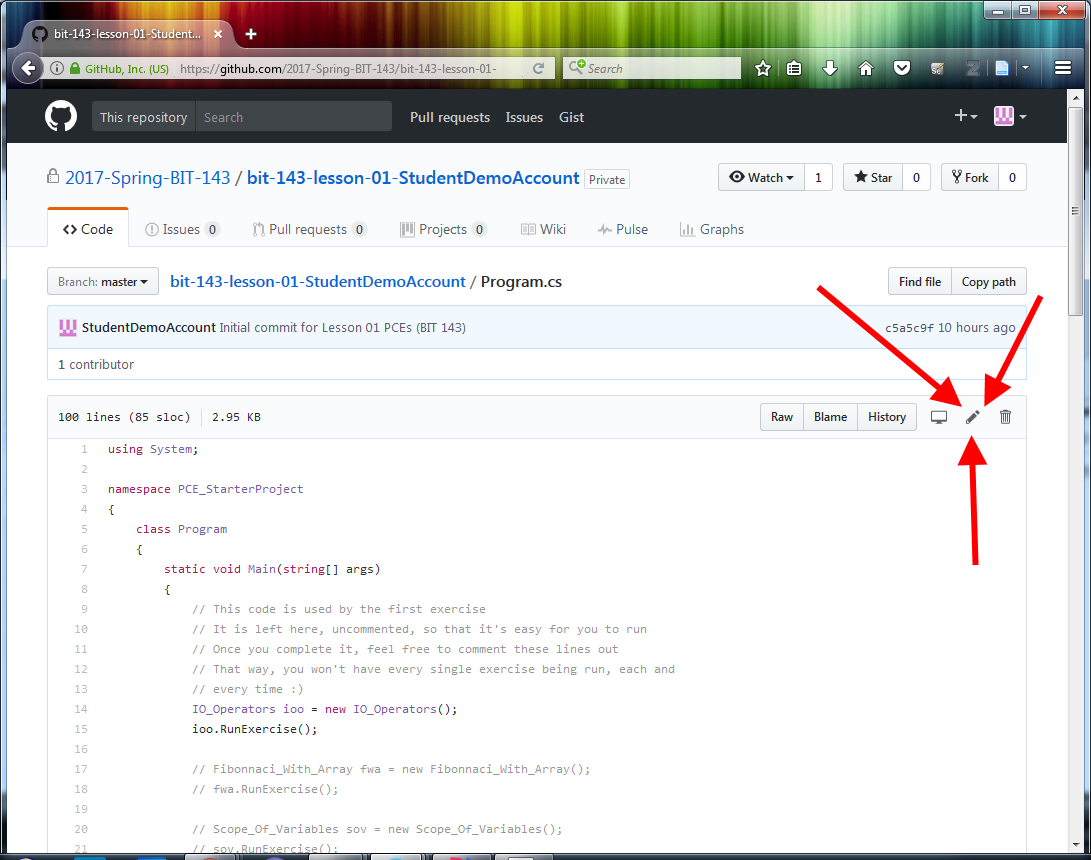
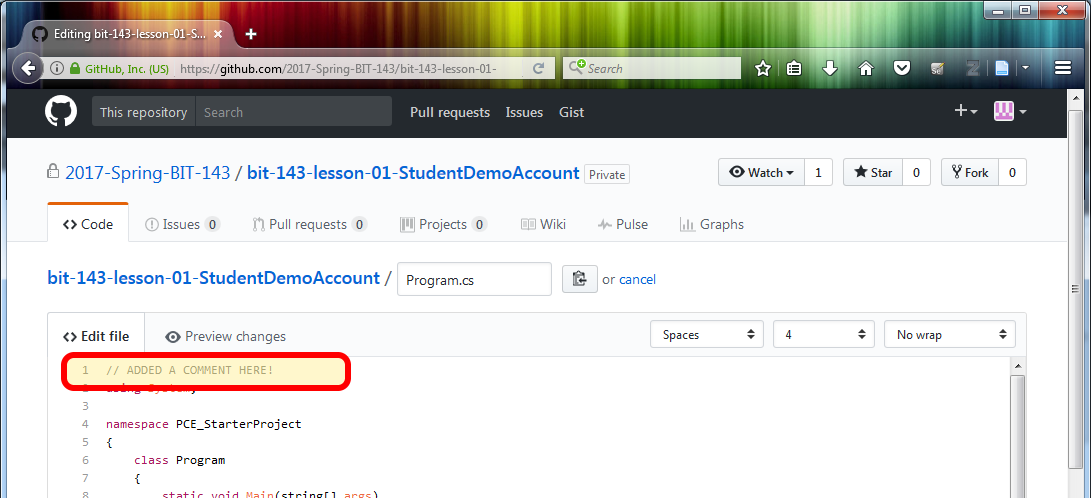
After you click on the 'Edit' button you should see the following:
Please add a comment in the highlighted box (like we did here)
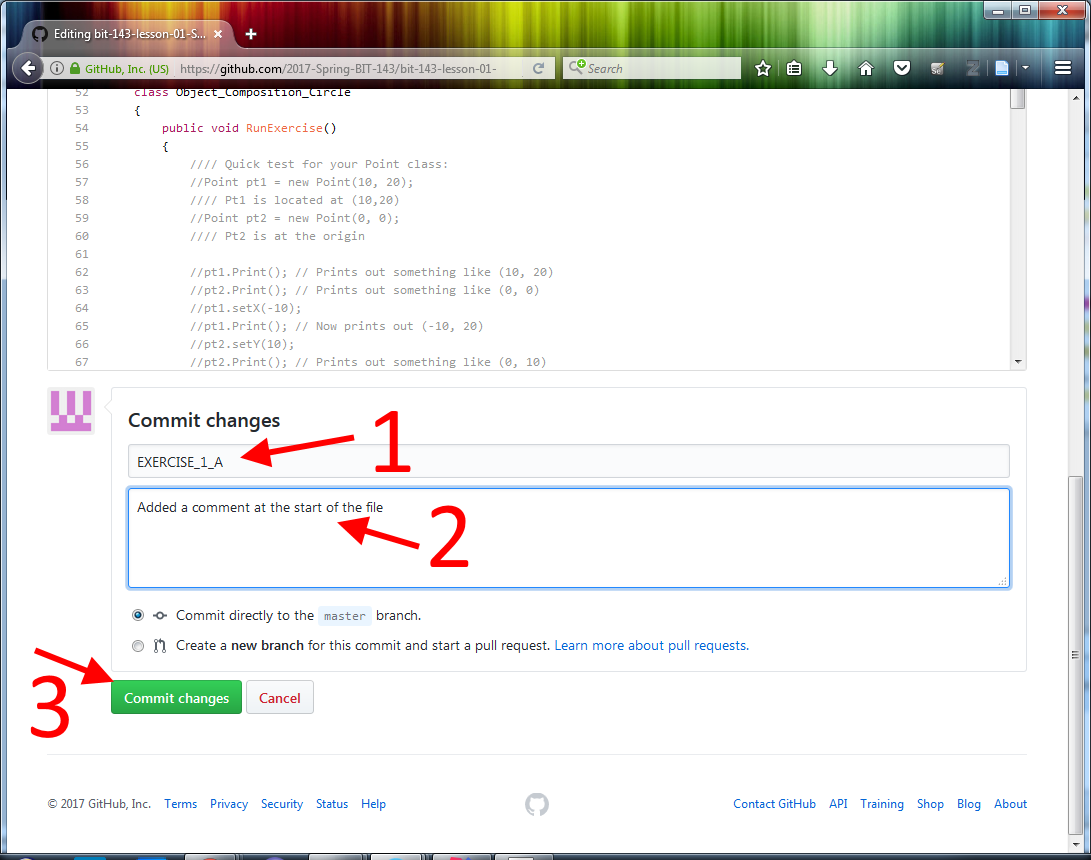
Next, commit (save) your change:
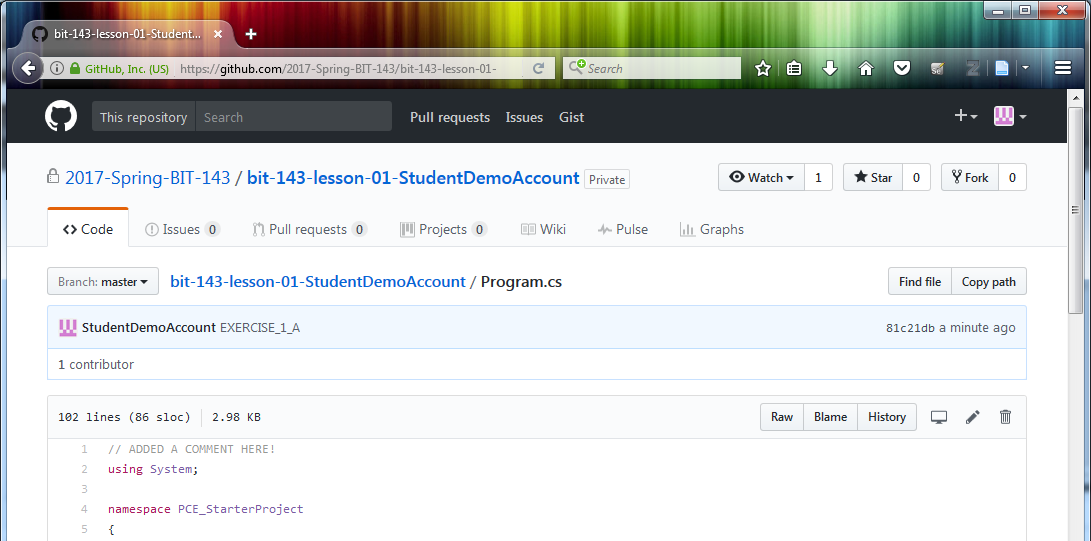
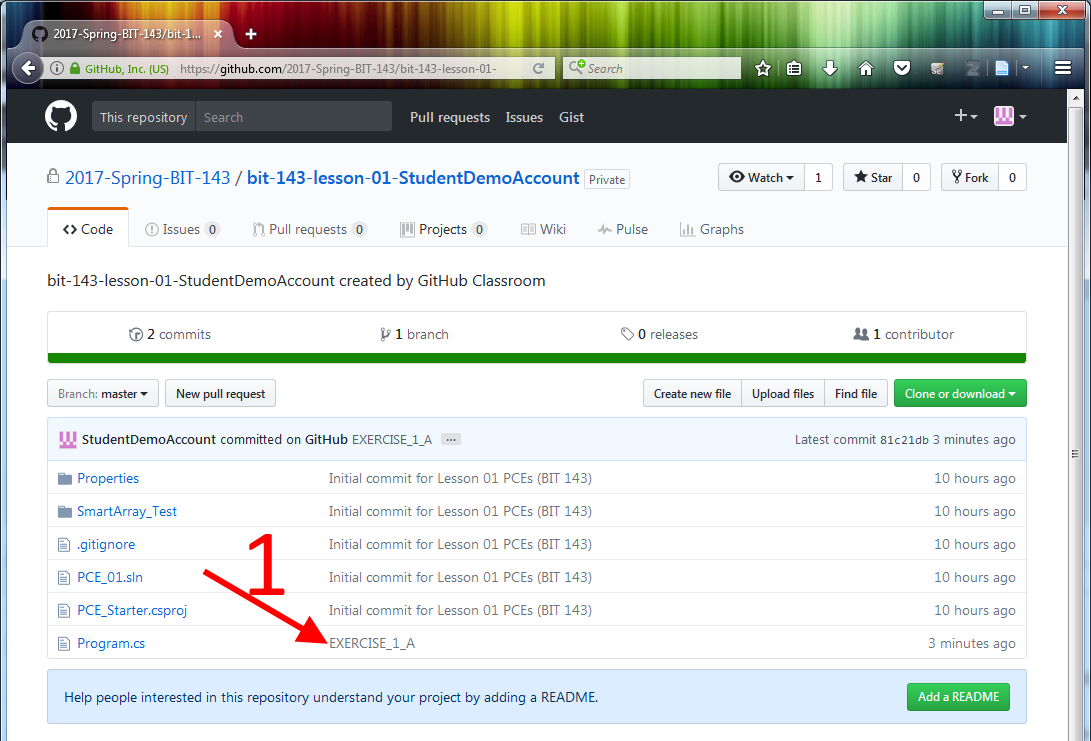
If everything worked you'll be able to see the change:
Go back to the repo page by clicking on the link (in the above picture)
You can make changes by clicking in the large textarea box pointed to by the '1' arrow.
NOTE: For this exercise please add your changes at the END of the file so it's super-clear what your changes are.
You won't be allowed to store your changes (to 'commit' your changes) until you enter a short message that describes what your change was. You can do this by typing something into the 'Commit Message' box (pointed to by '2')
Lastly, you can store your changes by clicking on the labeled 'Commit Changes' (pointed to by '3'). In the above picture that button is dimmed because there's no Commit Message (i.e., the box pointed to by the '2' is still empty), but it will become active once you add a commit message.
After successfully committing (storing) your change you should be brought back to the page which shows you the contents of your file. You should see the changes that you made in the file.